You will need to complete the entirety of the Nucleus Agent Setup document before attempting this section. If you have not yet set up the internal Nucleus agent, this will not work.
Nucleus Connector set up
-
From the Project Administration > Connector Setup page within a project, click on the icon of the scanning tool you want to set up.
-
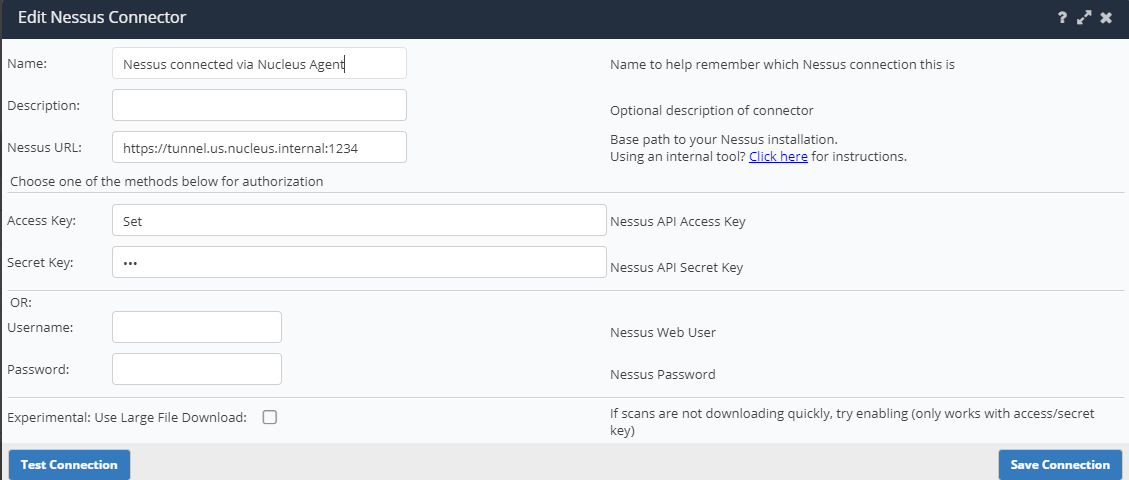
Complete the setup of your connector using the example below. The only change will be to use the url of the FQDN details and the port you assigned to the connection.
Example:
1: Select the regional FQDN to use (should match the region in your .ini file for the Nucleus Agent):
tunnel.us.nucleus.internal
tunnel.eu.nucleus.internal
tunnel.aus.nucleus.internal
tunnel.uk.nucleus.internal
tunnel.nucleusgov.internal (or simply tunnel)
2: Port you assigned to the connection (Use the assigned Nucleus port from previous document): 1234
So your connector setup would look like the following:
-
Click Save Connection
-
Once you get verification that the connector was saved, click Test Connection and wait for verification that the connection was successful.
You're all done! You are now running your connector through the Nucleus Agent to access your internal scanner.
Repeat these steps for all internal scanning tools linked to the Nucleus Agent.
Troubleshooting Nucleus Connector set up using Nucleus Agent
If you are having issues with the connection, make sure the agent is running successfully and use the checklist at the bottom of the Nucleus Agent Installation guide to troubleshoot the connection.
If you need any assistance, we're always read to help at: [email protected].