This article provides an overview of how to use Nucleus without using Single Sign-On (SSO) with your Identity Provider (IdP). It covers inviting and removing users, multi-factor authentication, and other user security controls.
User management
Users are centrally managed at the organization level in the Global Dashboard as well as on a per-project level. Users can be invited and added to one or more projects with user access roles at once at the organization level, or invited and added to individual projects at the project level. Once added, the full lifecycle of a user can be managed at the organization level, such as updating their project access, disabling and re-enabling their accounts, and removing them entirely from your Nucleus organization.
Managing users at the organization level
Steps to invite new users to Nucleus
- Navigate to Global Dashboard > Global Administration > Users. This page includes a list of all users in your organization including their project access and permissions.
- Click the Invite Users button to invite users not listed to join the Nucleus platform.
- In the resulting pop-up, enter a list of email addresses you want to add to the organization - comma, or newline separated.
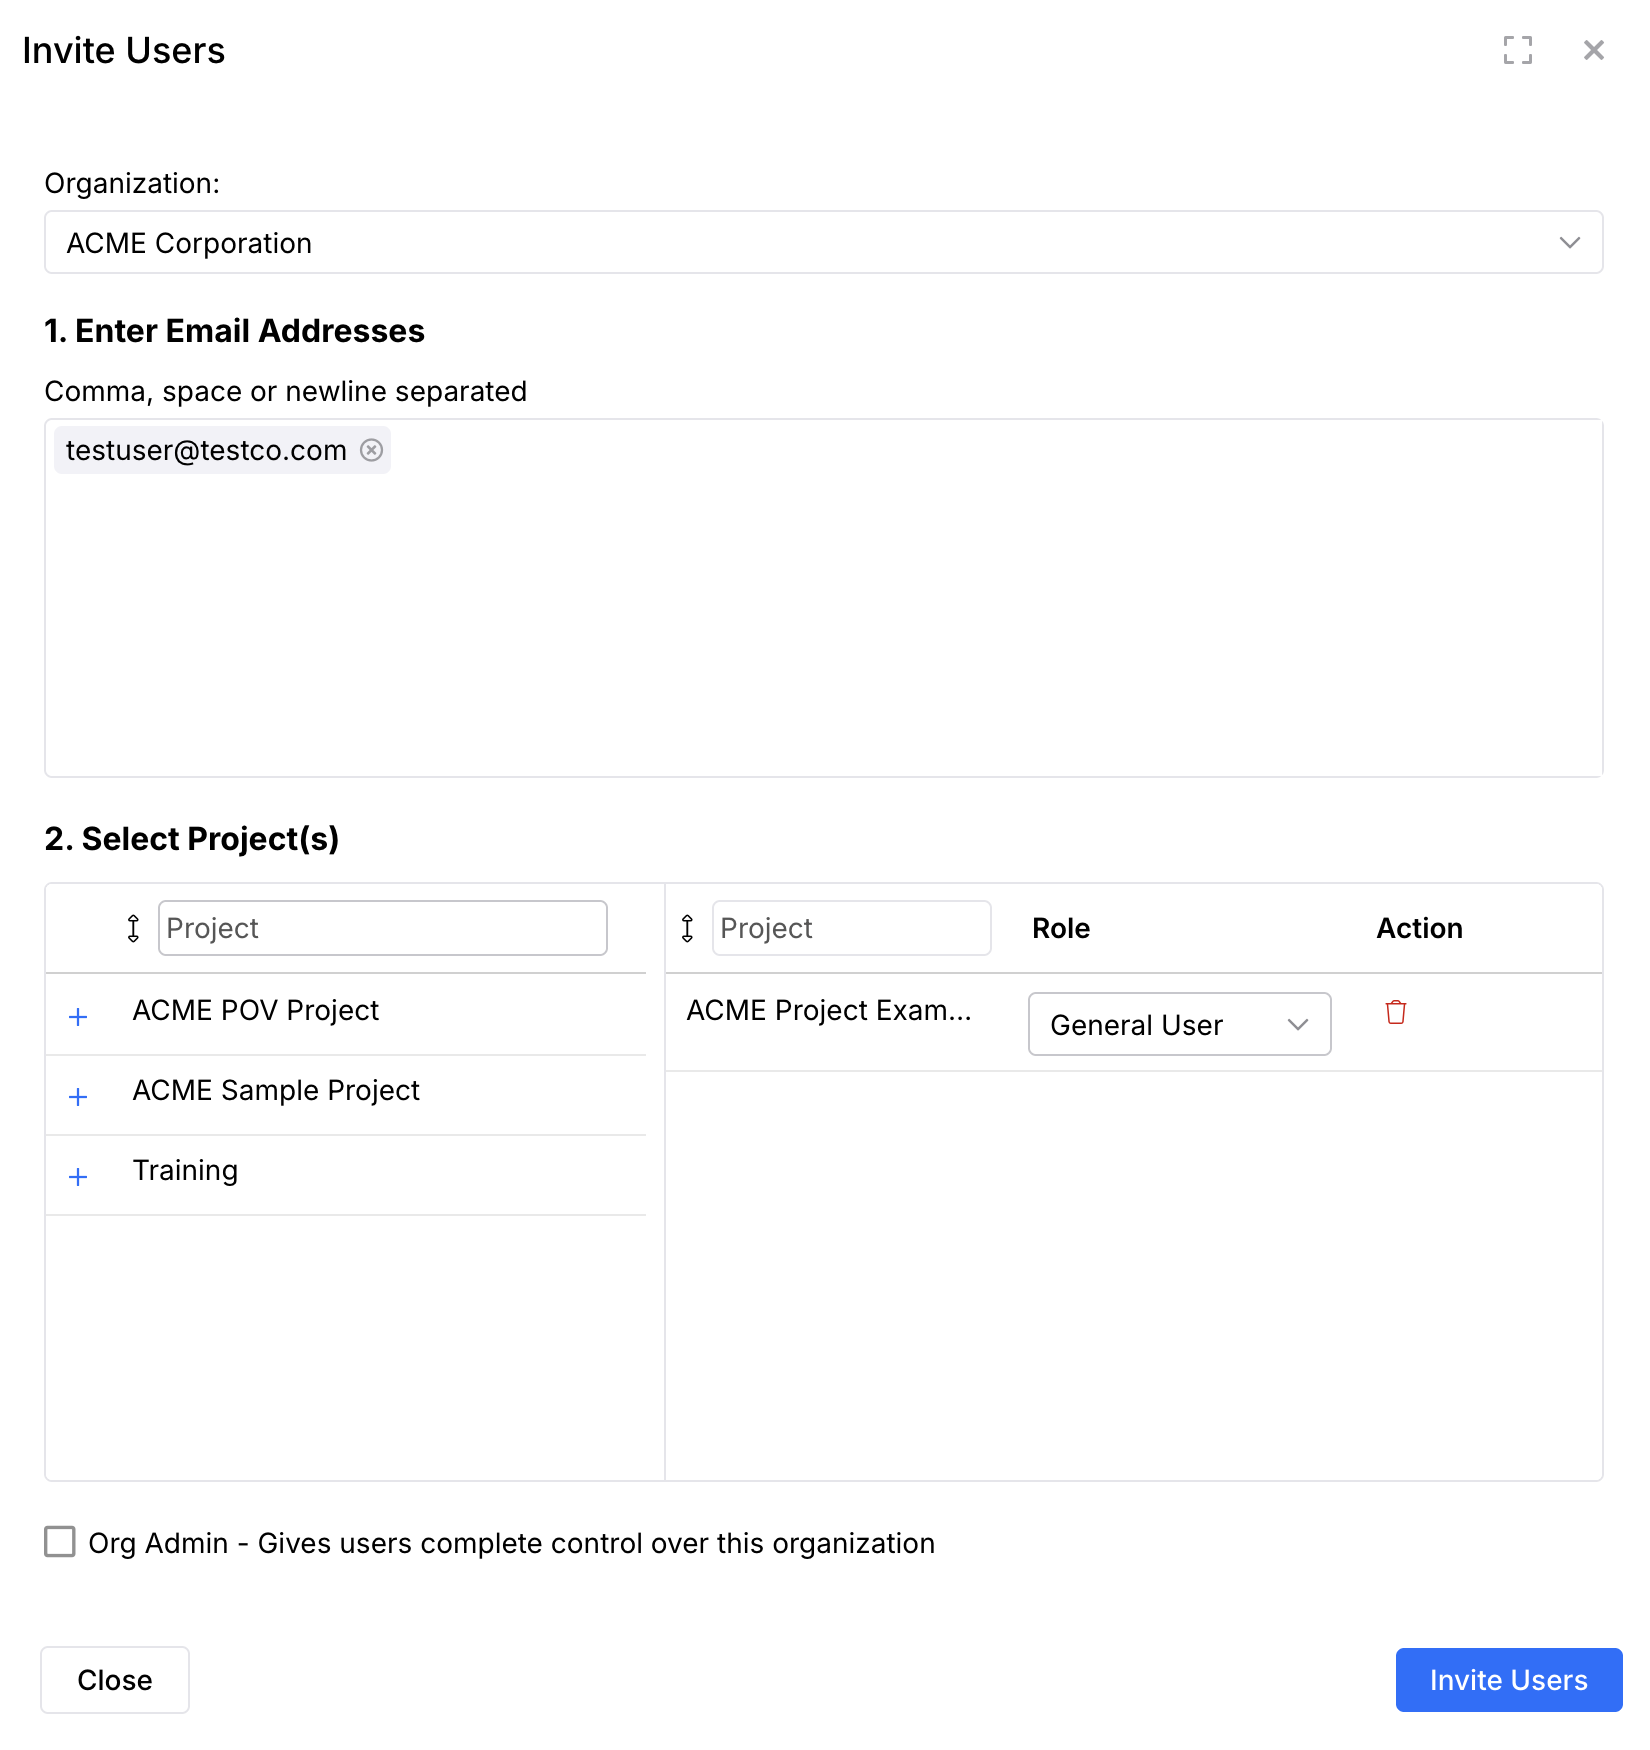
- Use the blue plus symbol next to the project name(s) you want the new user(s) to access.
- In the right panel, for each project you added, select the role you want the new user to have within the project.
- Click Invite Users.
- That's it! The invited users should soon receive Nucleus emails, be able to log in, and start contributing to Nucleus. These users will now appear in the User Management Section (Global Administration > Users).
Steps to update an existing user's projects and roles
- Go to Global Dashboard > Global Administration > Users.
- Click the blue Edit button on any user to open the "Edit User" window.
- If the user is already added to projects, you can change their role using the Role dropdowns in the Role column.
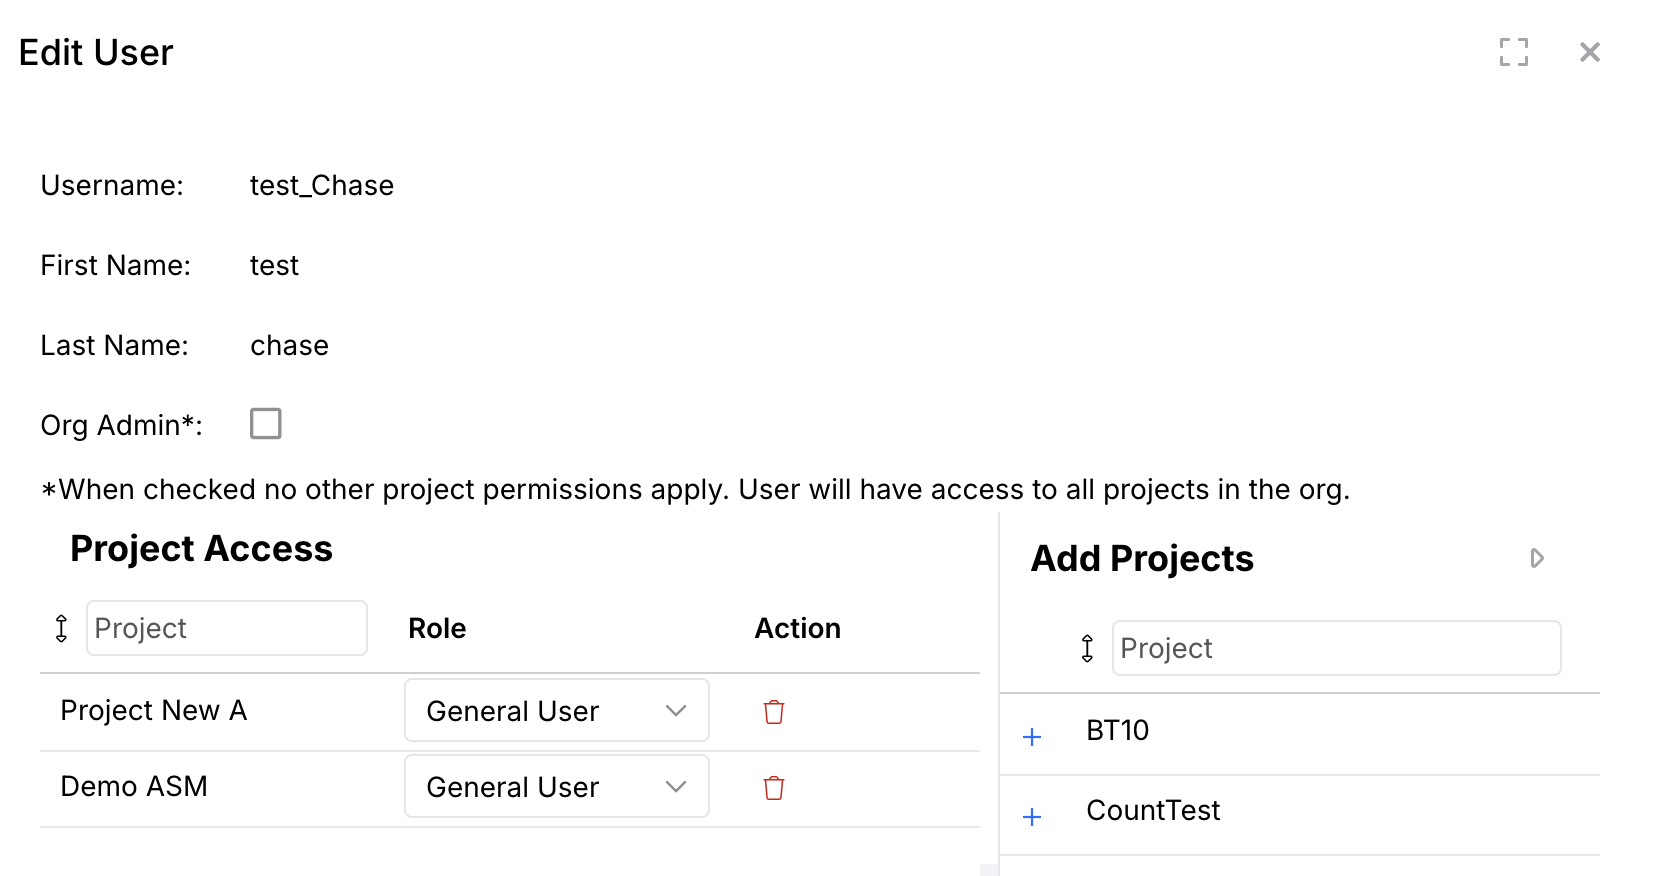
- If the user is not added to any projects, select the project(s) where you want to add the user by clicking Projects on the right. Then select the role you want the user to have within that project.
- Click the blue Save button to complete the process.
Steps to enable, disable and remove users from your Nucleus organization
- Go to Global Administration > Users.
- Select the user(s) that you'd like to enable or disable.
- From the Actions drop-down click Enable, Disable or Delete.
- Your user's access has now been updated.
 If the user was removed, all links to them will be removed from the platform.
Managing users at the project level
Steps to add users at the project level
- From within your project, navigate to Global Dashboard > Select your project > Project Administration > User Management.
- Click Invite Users.
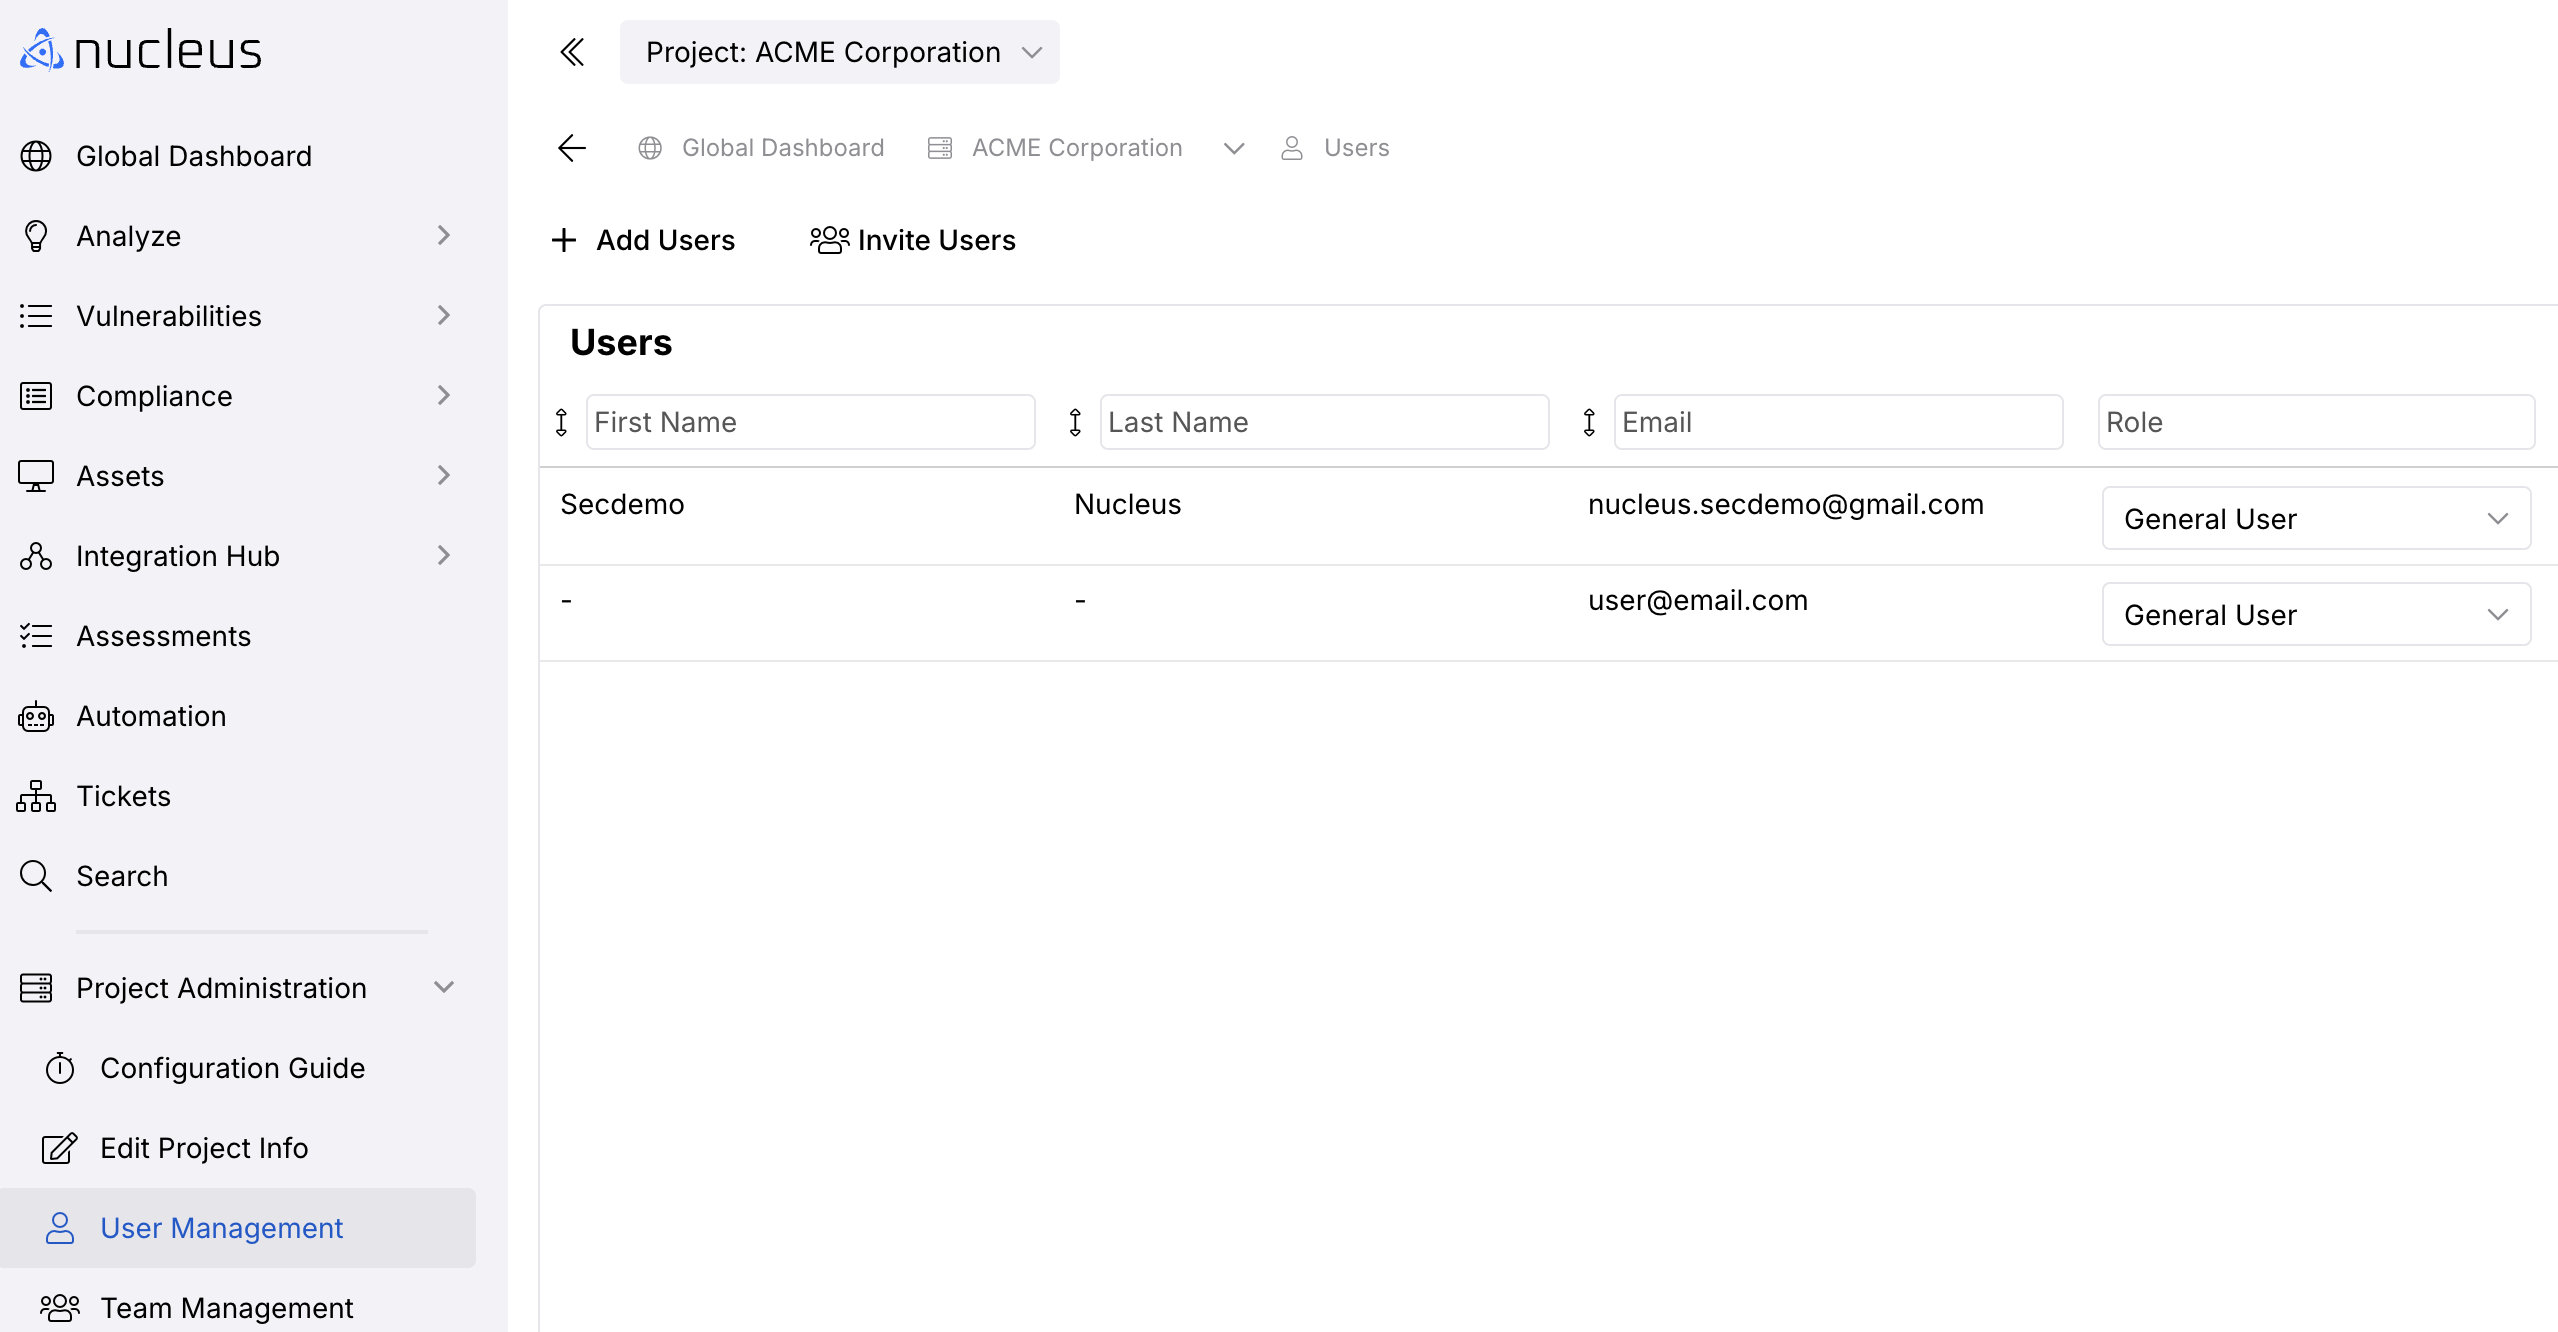
- Enter a list of email addresses you want to add to the organization - comma, or newline separated.
- Select the role you want these users to have within the project.
.png)
- Click Invite Users.
That's it! All invited users will receive an email to login to Nucleus.
User Security Controls
Nucleus provides a number of security controls for managing the security of a user's login experience, as well as their lifecycle within the platform.
Password Policy
Passwords must meet the following requirements:
- 12 characters minimum
- May not contain “Nucleus”
- No repeating characters 3 or more times
Multi-Factor Authentication (MFA)
Nucleus supports two forms of Multi-Factor Authentication (MFA) to protect user accounts from password brute force attacks:
- Time-based One-time Password (TOTP) via an Authenticator app
- TOTP emailed to the user for login
To enable MFA, follow these steps:
- Go to Global Administration > Users
- Click your user profile icon in the Nucleus toolbar.
- In the User Profile pop-up, click the 2-Factor Auth tab
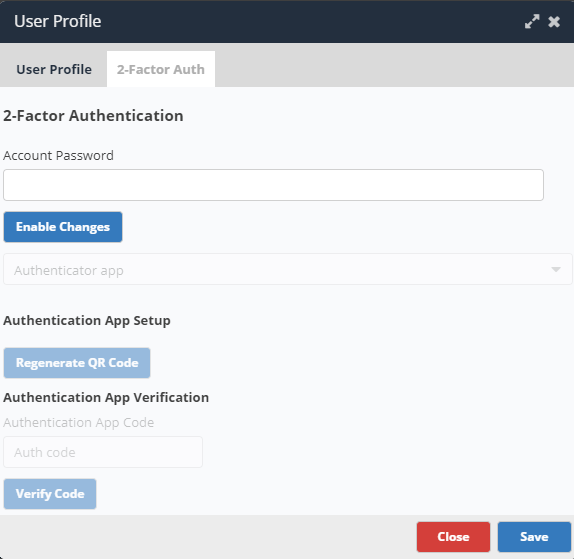
- Enter your password and click the Enable Changes button to proceed to the next step.
- Click Regenerate QR Code.
- Scan the QR Code into your preferred authenticator app.
- Enter the resulting code in the Authentication App Code field and click the Verify Code button.
- Click the **Save** button and you're done!
Automatically Disabling Inactive Users
Users that have not logged into Nucleus after a period of time can automatically be disabled. Follow these steps to configure this for your Nucleus organization:
From the Global Dashboard, go to Global Administration > Organizations.
Click the Edit button in the Actions column to the right of your organization.
In the Edit Organization pop-up modal, set the number of days of inactivity under the Disable Inactive User After field.
Click Save.
User Session Timeout
You can specify the number of minutes that a user must is inactive for in a single session before being logged out of Nucleus automatically. By default, all users are logged out after 60 minutes of inactivity unless otherwise changed.
Follow these steps to configure this for your Nucleus organization:
From the Global Dashboard, go to Global Administration > Organizations.
Click the Edit button in the Actions column to the right of your organization.
In the Edit Organization pop-up modal, set the number of minutes of inactivity under the Log Users Out field.
Click Save.