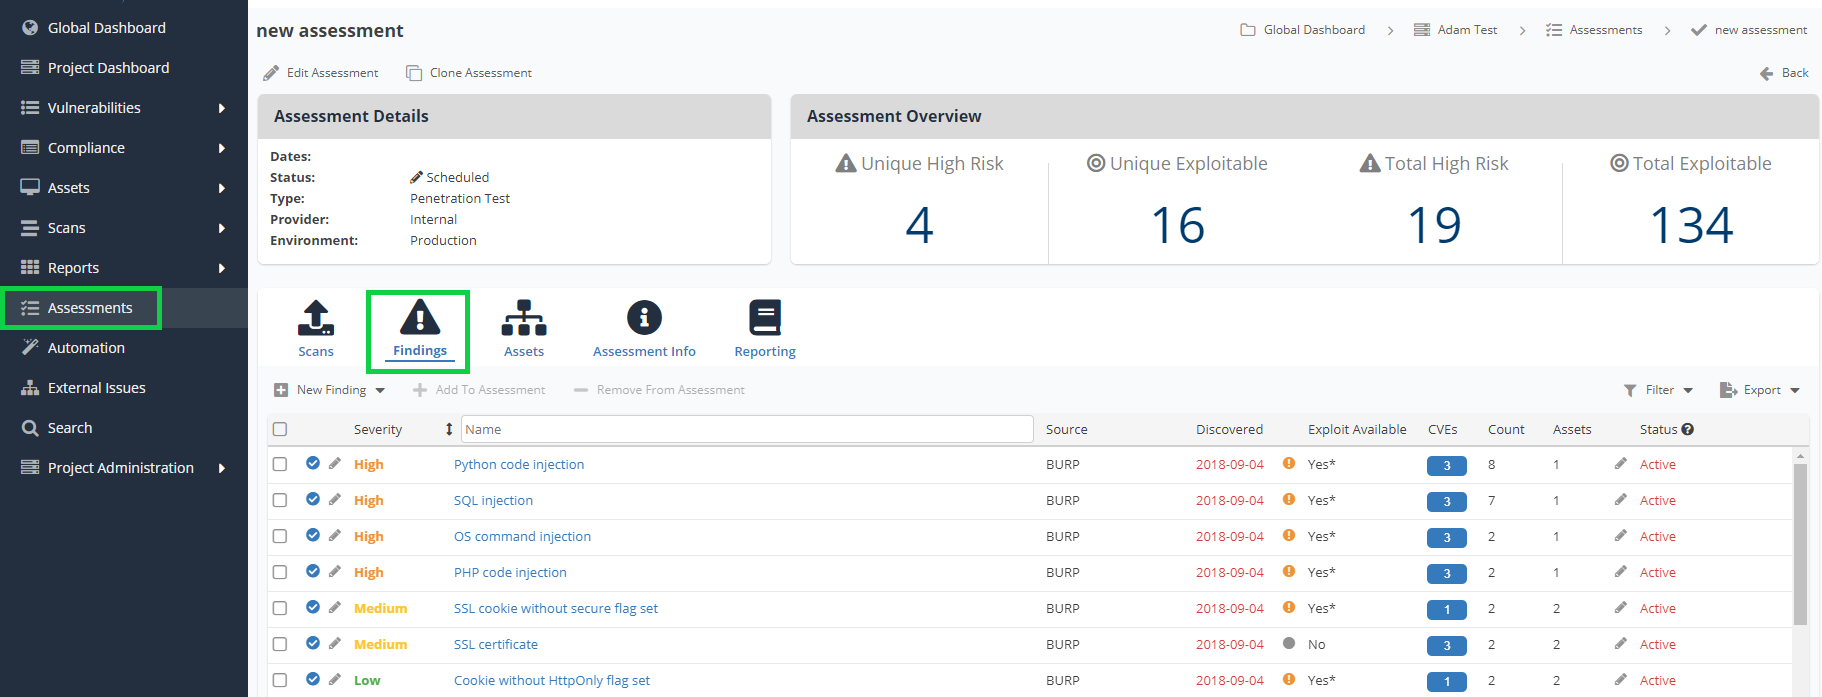
Importing Scan Results into an Assessment
You can upload scan results from popular vulnerability scanners directly into a Nucleus assessment. Nucleus will then create assets and findings based on the data from that scan. Scan results can be from any format Nucleus recognizes, including FlexConnect, or the native formats of several popular vulnerability scanners.
Uploading scans via the UI
To upload a scan to an assessment, click the Scans icon inside any open assessment. Drag and drop your scan results into the UI, or click Select Files to choose your scan results from a dialog box. You may upload as few or as many scan files as you need.
Uploading scans via the API
Scans can also be uploaded directly to an assessment via the API. Doing this is a two step process:
- Identify your assessment's project id by using the GET /projects/{project_id}/assessments API to return a list of all assessments for your Nucleus project.
- Using the project_id for your assessment, submit a scan to the assessment by using the POST /projects/{project_id}/scans API.
Manually creating Assessment findings and assets
Not all assessment findings come from scan results. For these, you can create findings by hand. This process is less automatic, but Nucleus aims to make it manageable.
Before you create a finding, you need assets to attach them to. Nucleus will import assets from scan results, but if the finding you're entering manually was not present in a scan, you can select any asset in Nucleus. Click Assets, then select Add from project asset list to import assets from your Nucleus project, or select Add a new asset to create a brand new one. Be sure to create or import assets to match every finding in your assessment.
Now that you have assets, you are ready to create findings to attach to those assets. Click Findings > New Finding, then select Using template or Custom, depending on how much guidance you want from the user interface. Enter the details of your finding, including the assets and the instance details, clicking Next and Finish at each stage of the process.
Your finding is not yet part of your assessment! After you are finished entering the finding, click the checkbox next to the finding you entered, then click the + Add to assessment button to finalize it.
You may enter findings one at a time and add them to the assessment one at a time, or create and then add them in bulk. We recommend one at a time to minimize the chances of losing work.
Including findings in a delivered assessment
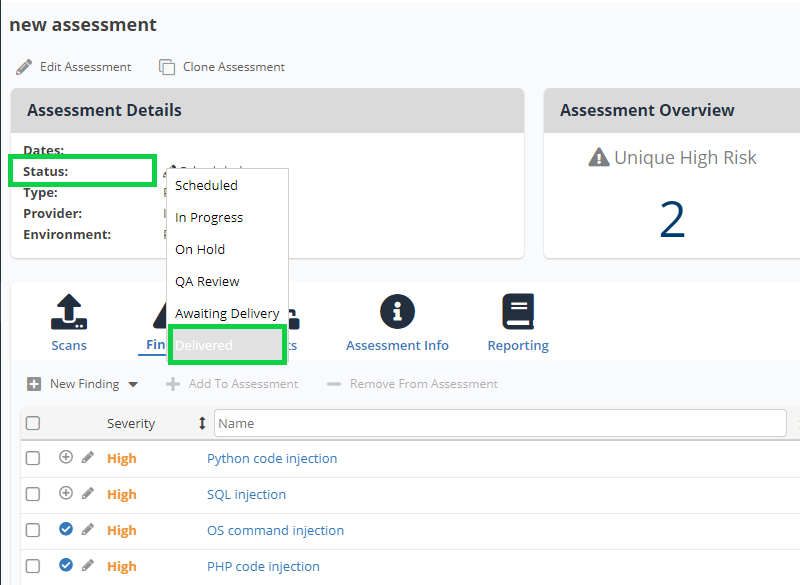
Before setting the status of an assessment in Nucleus as Delivered, you may want to select which findings to include in the assessment.
- Navigate to Assessments > Assessment Details > Findings
- Select or deselect the findings you want included in the Delivered assessment using the blue check/gray minus buttons for each finding.
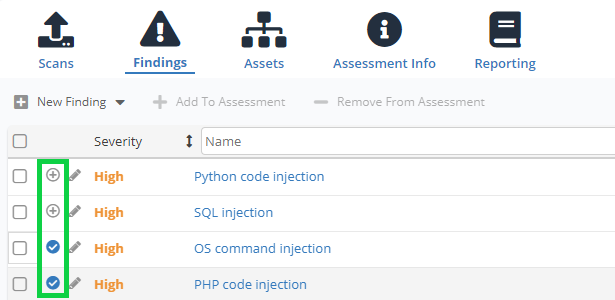
All findings are selected by default.
- After you've selected all the findings you want to include in the assessment, set the Status to Delivered.
Next steps
After adding findings and assets to your assessment, proceed with reporting and delivering your assessment.
Repeating an Assessment
You can use the Clone Assessment function to clone assessment metadata. This feature can be used to clone the scope of an assessment to help streamline repeated assessments (such as an annual pen test). Note that this feature only clones assessment metadata (which is captured under the Assessment Info section) and does not clone findings or assets.