Overview
Nucleus enables you to ingest assets and vulnerabilities from the Censys ASM directly into your Nucleus console using an automated connector. The connector uses the APIs provided by Censys to seamlessly sync data into your Nucleus project for use in analysis, triage, automation, and reporting.
The Censys connector supports importing hosts, risk instances and certificates from Censys Attack Surface Management (ASM).
Connector Setup
Connector Setup Checklist
Follow the steps in this checklist to successfully set up this connector:
- API Access
Create an API Key in Censys ASM. - Connector Configuration
Create and configure the connector in your Nucleus project. - Data Ingestion
Create an ingest rule to ingest assets, vulnerabilities and certificates from Censys ASM.
1. API Access
Account Access
We recommend creating a separate user account to act as a service account instead of a regular user account to ensure maximum security and uninterrupted integration.
- Login to Censys ASM.
- Select the Team Workspace that you would like to integrate with.
- In the top menu bar, select Integrations.
- Click Reveal API Key.
- Make a copy of the API Key for use when configuring the connector.
2. Connector Configuration
- Open Nucleus and go to Integration Hub > Connector Setup.
- Under the Scanners section, click the Censys icon. You will see the following popup:
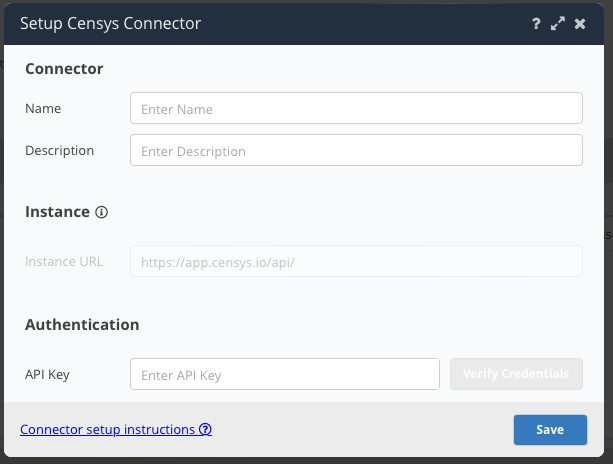
- In the Setup Censys Connector popup, enter the following information:
| Field | Description |
|---|---|
| Name | Enter an optional name for your connector. |
| Description | Enter an optional description for your connector. |
| API Key | Enter the API Key you created in API Access. |
- Click Verify Credentials.
- Click Save.
3. Data Ingestion
- Go to Integration Hub > Import via Connector.
- Select the Censys connector you just created.
- Select importing All Hosts.

- Select a schedule to import data into the project.
- Click Save & Finish.