Overview
Supported Checkmarx versions: 7.0+, 8.0+, 9.0+, . Nucleus requires the "Scanner" or "Reviewer" role within Checkmarx, from this page on the Checkmarx website.
Nucleus enables you to sync your Checkmarx SAST data directly from the Checkmarx console into the Nucleus console using an automated connector. The connector uses the APIs provided by Checkmarx to seamlessly sync data from your Checkmarx server into various Nucleus projects for use in analysis, triage, automation, and reporting.
Connector setup
-
In Nucleus, go to Integration Hub > Connector Setup.
-
Under the Scanners section, click the Checkmarx icon.
-
In the Setup Checkmarx Connector popup, complete the following fields:
| Field | Description |
|---|---|
| Name | Enter a short unique name for the connector, such as "Checkmarx ServerName" |
| Description | Optionally, enter a description for the connector |
| URL | Enter the URL for your Checkmarx login page |
| Username | Enter the username of the user you use to log into Checkmarx |
| Password | Enter the user password for the username you just entered |
-
Click the Save Connection button and wait for the Success message.
-
Click the Test Connection button. You'll see a message to notify you that the connection test was successful. Your connector is now setup properly.
-
Close the popup window.
-
Go to Import Files > From Connector to start selecting scans to import!
Import data from connector
- Go to Integration Hub > Import via Connector.
- Select the Checkmarx connector you just created.
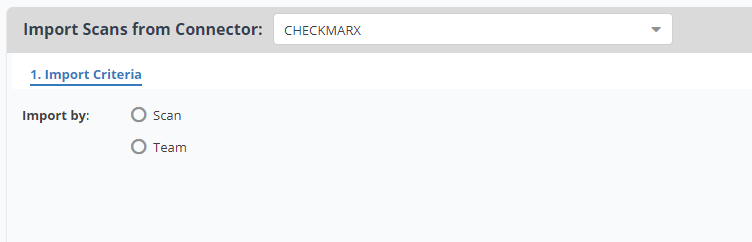
- Choose to import either a set of scans from Checkmarx or import an entire team's results at one time.
- Click Next and select either the teams or the scans you want to import.
- Select the import frequency as a one-time import, or auto-imported on a schedule.
- Click Save & Finish.
Import custom Checkmarx fields to Nucleus
Nucleus allows you to make a deeper connection with Checkmarx in order to orchestrate additional actions in Nucleus. To do this, you'll give Nucleus additional information about each application to better organize Checkmarx projects within the Nucleus asset database.
- Log into Checkmarx.
- Go to Settings > Manage Custom Fields.
- Add any one of the following custom fields supported by Nucleus:
| Checkmarx Custom Field Name | Nucleus Field will be populated |
|---|---|
| git_repo_name | Asset Name |
| git_branch_name | Branch |
| git_repo_url | Repo URL |
Note that the Branch field will only be populated by git_branch_name if the git_repo_name is also set.
You will need to have your developers fill out the custom field information when they upload their code to be scanned by Checkmarx.
Example use case
Checkmarx uses a naming convention to specify branching of projects. A development team can fill out the git_repo_name and git_branch_name fields to tell Nucleus what git repository the project is for and what branch they are scanning.
Special considerations
- Nucleus imports the team structure from Checkmarx as nested asset groups in the Nucleus Asset Management database so you can utilize your existing organizational hierarchy. This allows you to implement filters and automation rules from your Checkmarx data on your vulnerability scan results.
- Scheduled imports are designed for importing future scans and will only include 3 months of historical scans when it checks for new data. If you want to import historical data, you'll need to manually select historical scan results.
- commit_hash is pulled in as ‘Revision’.
- customfields is pulled in as cxsast.customfields.field only via connector.
- Checkmarx owner, projectname, preset, and team is always pulled in as additional metadata (cxsast.owner, cxsast.projectname, cxsast.team, cxsast.preset, cxsast.teampath.
Status Mappings
Statuses from Checkmarx CxSAST are mapped to Nucleus statuses in the following way:
| Checkmarx CxSAST Result | Nucleus Status |
|---|---|
FalsePositive attribute is set to TRUE |
False Positive |
state attribute is to 4 |
Exception Requested |
If you have any questions, please reach out to our support center or email [email protected].