Overview
Nucleus enables you to ingest your Tanium vulnerability data into Nucleus using the Tanium connector.
How it works
Tanium has a built-in module for extracting data out of Tanium and then pushing them to other places. The Nucleus integration uses the Tanium Connect module to receive data from Tanium at scale.
This Tanium integration is a push from Tanium Connect, so Nucleus will not be interacting directly with Tanium. Users within Nucleus will not be able to request scans, the data will refresh as the data gets pushed from Tanium to Nucleus.
The Tanium Connect schedule is completely configurable on the Tanium side. It's important to configure the reports from Tanium to be scoped appropriately so make certain that the Tanium push settings include all the data you want to receive, on the correct schedule, for the data push into Nucleus. For example, should Workstations come in at midnight ET every night? You will need to work with your internal Tanium team to make sure the schedule works for them.
Connector Setup Checklist
Follow the steps in this checklist to successfully setup this connector:
1. Create the Tanium Report in Tanium Comply module
Create the Nucleus Tanium report in the Tanium Asset module.
2. Create a connection using the Tanium Connect Module
Create a Tanium Connection to push the data to Nucleus. Set the five configurations required for the connection.
Based on our testing, the Tanium Connect destination configuration Batch size must be adjusted to under 200MB. 50000 rows should be the maximum value.
3. Save the connection and run it
Save the connection, run it in Tanium, and confirm it in the Tanium Connect log.
1. Tanium - Create Report
-
Log into your Tanium console.
-
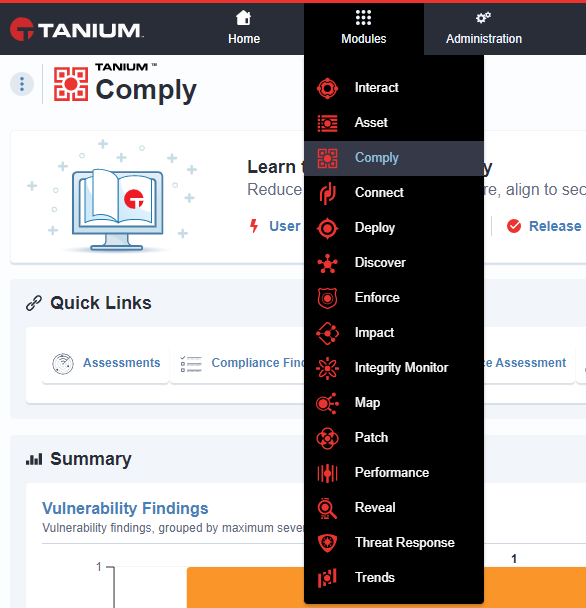
Go to "Modules > Comply"
-
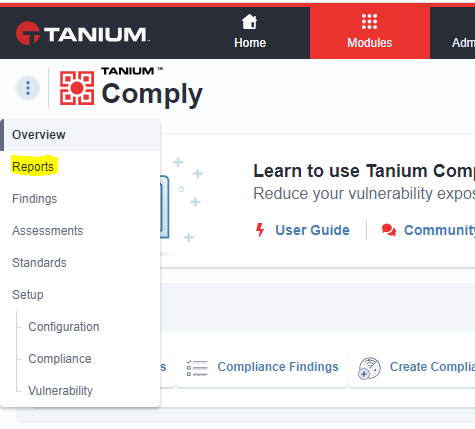
In the top left corner of the screen, locate the 3-dot menu, click the menu, and select "Reports"
-
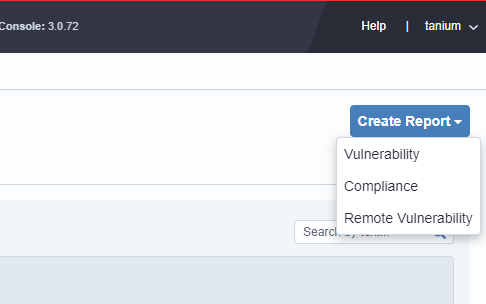
In the top right of the screen, select "Create Report > Vulnerability"
-
Locate the tab named "All Findings" and click "All Findings" to view the list of CVEs for your environment
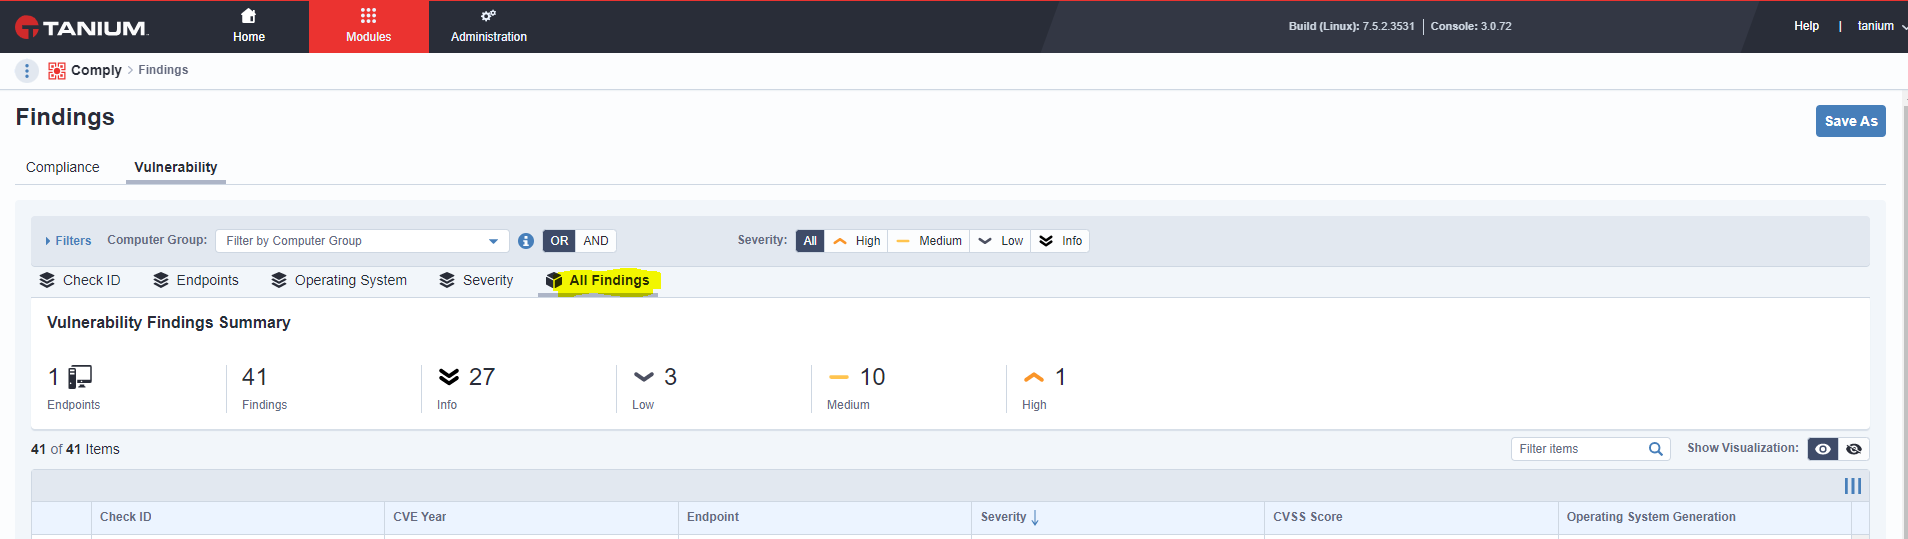
If you have a lot of findings, such as millions, it's best to divide your Tanium uploads into multiple segments using filters to improve upload performance. For example, you can filter by "Computer Group" to select all Windows Machines or other groups you can readily create. Most customers will leave the default setting "All Findings".
You can also choose to only select specific severity levels to upload to Nucleus.
- Select "Save As" in the top right corner.
- Name the report something easily recognizable (include Nucleus in the name).
- Make sure to keep the "Content Set" as "Comply Reporting".
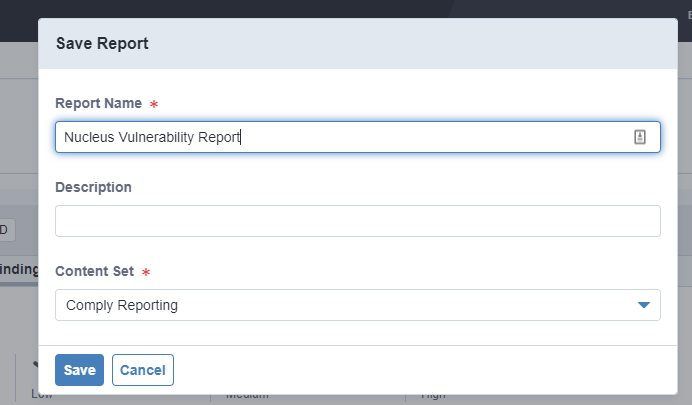
- Make sure to keep the "Content Set" as "Comply Reporting".
2. Tanium - Create a Connection
Nucleus recommends setting up the Tanium integration using a Nucleus service account rather than a user account. Please ensure that the account has access to Import Scans Manually.

2.a Configure Source
- Now that you created a report, you'll set up a Tanium Connection to push the report to Nucleus. Go to "Modules > Connect"
- Click "Create Connection"
- Name the connection something recognizable and related to Nucleus, such as "Comply Vulns push to Nucleus - Prod environment"
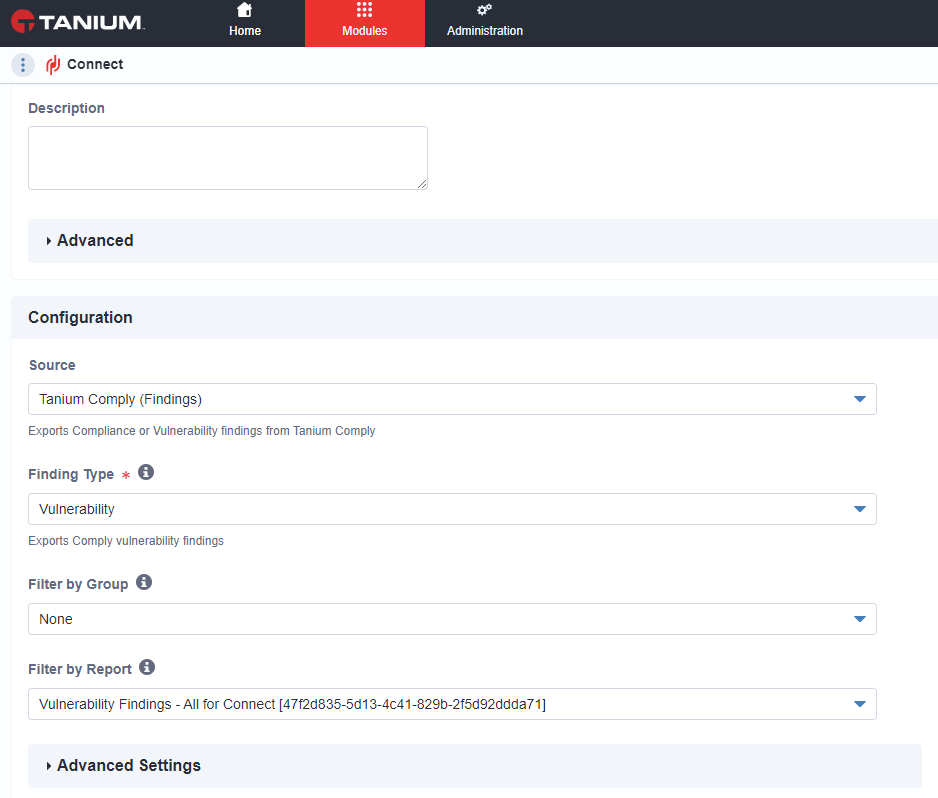
- Under "Configuration, select Source > Tanium Comply (Findings)
- Finding Type = Vulnerability
- Filter by Group = None
- Filter by Report = The report you named in the steps above
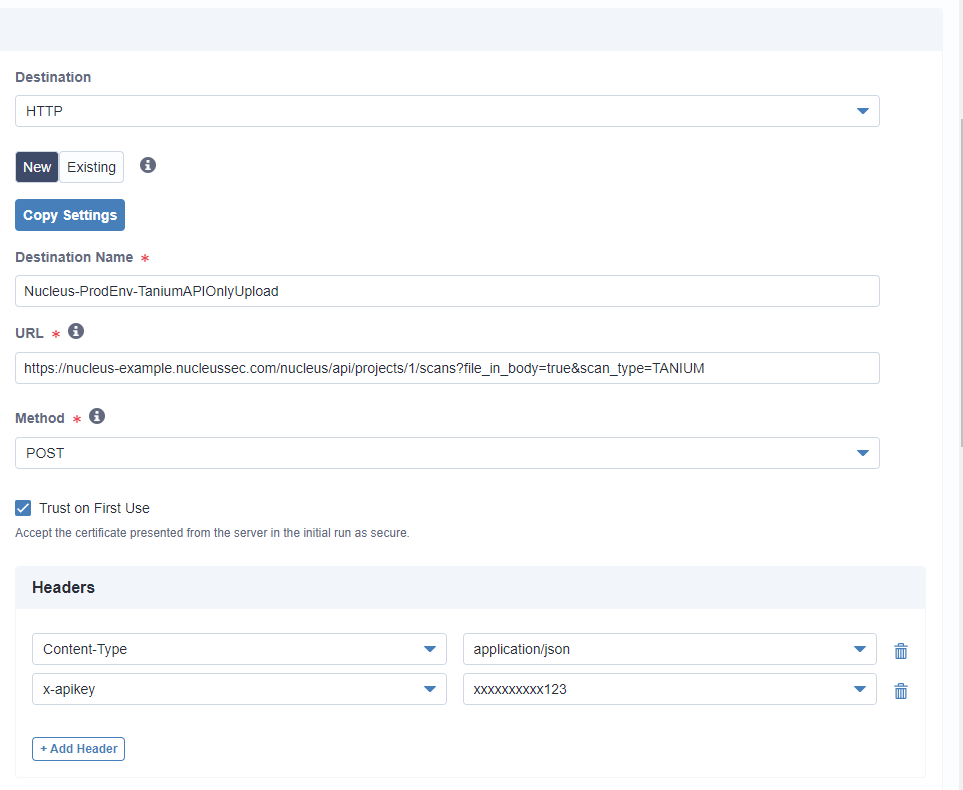
2.b Configure Destination
-
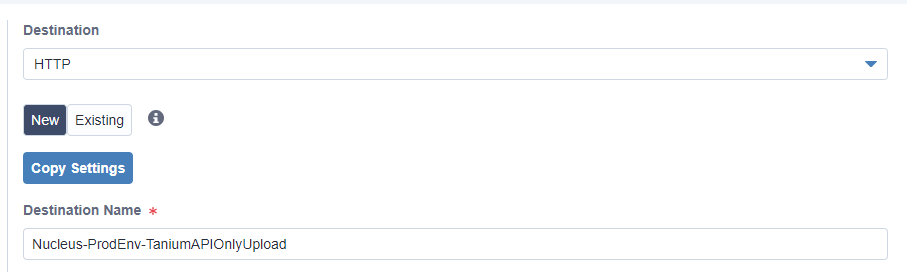
Under "Destination" select "HTTP"
-
Name the Destination in a way that enables you to use the connection elsewhere. This should be a combination of Nucleus, project name, and API key or API user name.
- If you have an existing URL in Tanium, you can choose to use an existing connection.
- If you have an existing URL in Tanium, you can choose to use an existing connection.
-
Now you'll find the correct URL, and enter the URL into the Tanium Connect form
1.Go to your Nucleus console
2. Find the root url of your Nucleus console in the browser (should be something like "example.nucleussec.com")
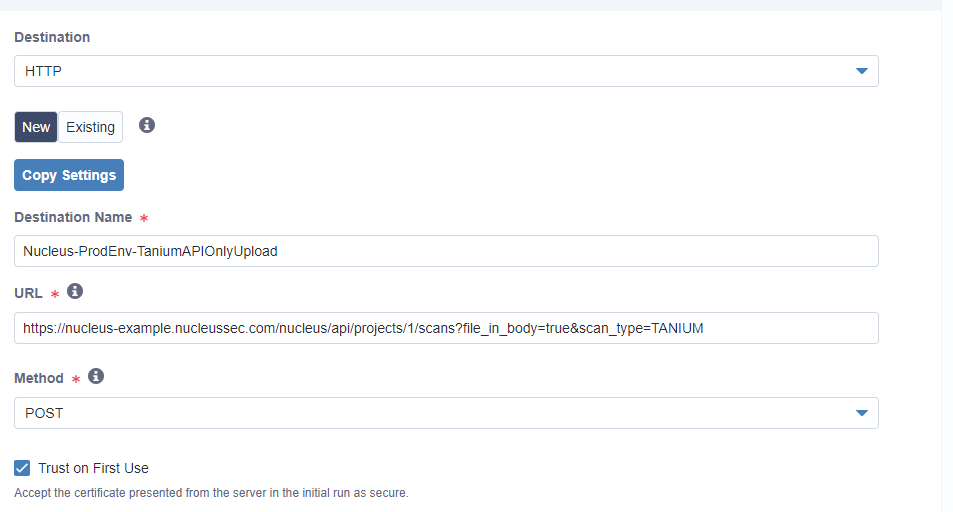
3. Paste the following URL into the Tanium Connect URL field, replacing the fields in {} with your own data
4. https://{nucleus_root_url}/nucleus/api/projects/{project_id}/scans?file_in_body=true&scan_type=TANIUM
5. nucleus_root_url is the url you found in step 2.b.2 above
6. project_id is found on the Global Dashboard in your Nucleus console in the "Projects" table
7. Example URL: https://nucleus-example.nucleussec.com/nucleus/api/projects/1/scans?file_in_body=true&scan_type=TANIUM (NOTE: redirects to google.com since this is just an example url) -
Select "Method" of "POST" and "Trust on First Use" is selected
The end result should be something like this:
2.c Configure Headers
- Click "+ Add Header"
- In the left-hand column type "x-apikey"
- Generate an API key or API user in Nucleus
- Paste the API key in the right-hand column
Final Result:
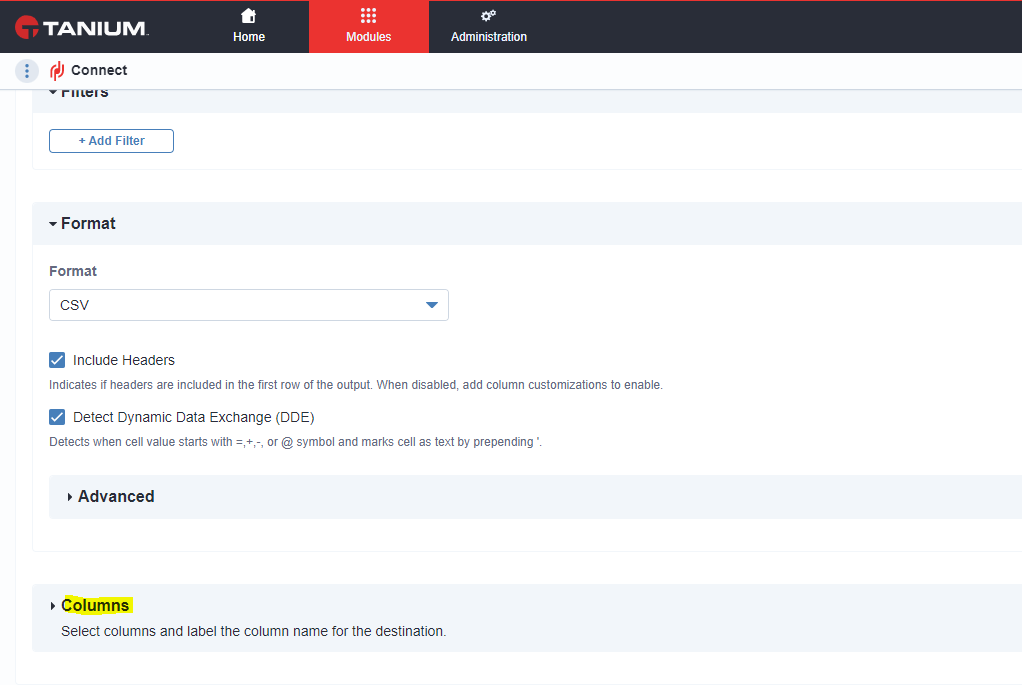
2.d Configure Output
- Scroll down to the "Configure Output" section.
- Expand "Format"
- Select CSV
- Make sure "Include Headers" is selected
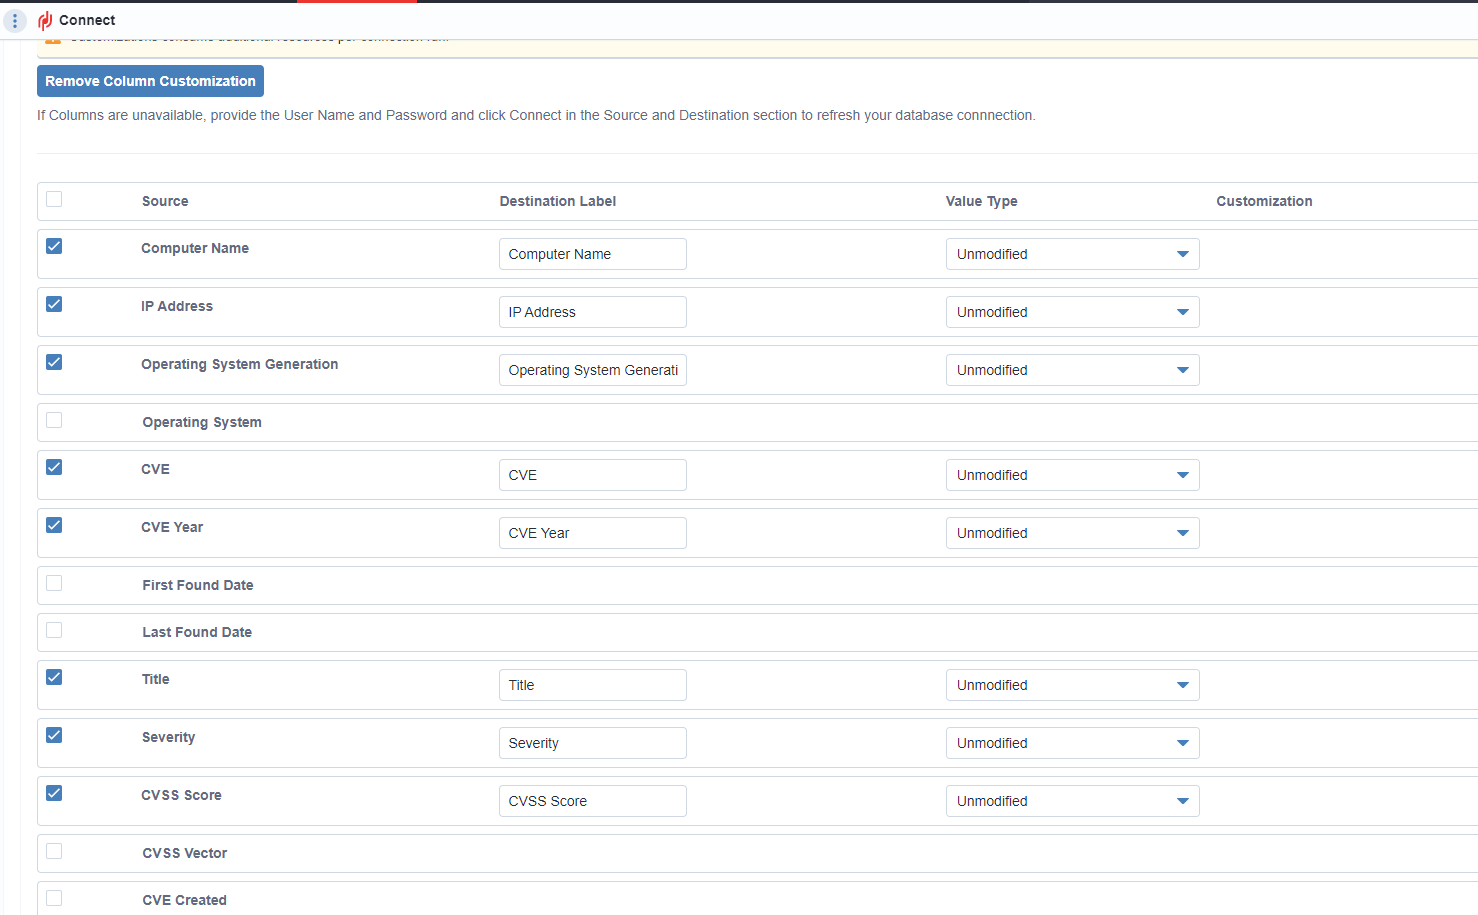
- Click to expand "Columns"
- Enable the following columns
| Column | What does it map to? | Required |
|---|---|---|
| Computer Name | host_name in Nucleus | Yes |
| First Found Date | finding_discovered in Nucleus | Yes |
| Last Found Date | last_seen in Nucleus | Yes |
| IP Address | ip_address | Yes (not all computers will have a hostname, and an IP OR a hostname is required to create an asset in Nucleus |
| Operating System | operating_system_name | Yes |
| CVE | finding_cve | Yes |
| Title | finding_name | Yes |
| Severity | finding_severity | Yes |
| CVSS Score | cvss_score | No |
| Remediation | finding_recommendation | No (Only if you want a solution to populate in Nucleus) |
| Details | finding_description | No (Used to populate the finding description, so highly recommended) |
Every other field/column is optional. While Nucleus supports importing the other fields, the above fields need to be included at a minimum to ensure enough Tanium data is ingested into Nucleus to be useful. The final result should look like this:
3. Save the Connection and Run it
- Scroll all the way to the bottom and select "Save" or "Save and Run"
- This will take you to the Tanium Connect log where you can see the status of a running Connect job. You can also schedule this report to run on a schedule from here by "Editing" the Connection.
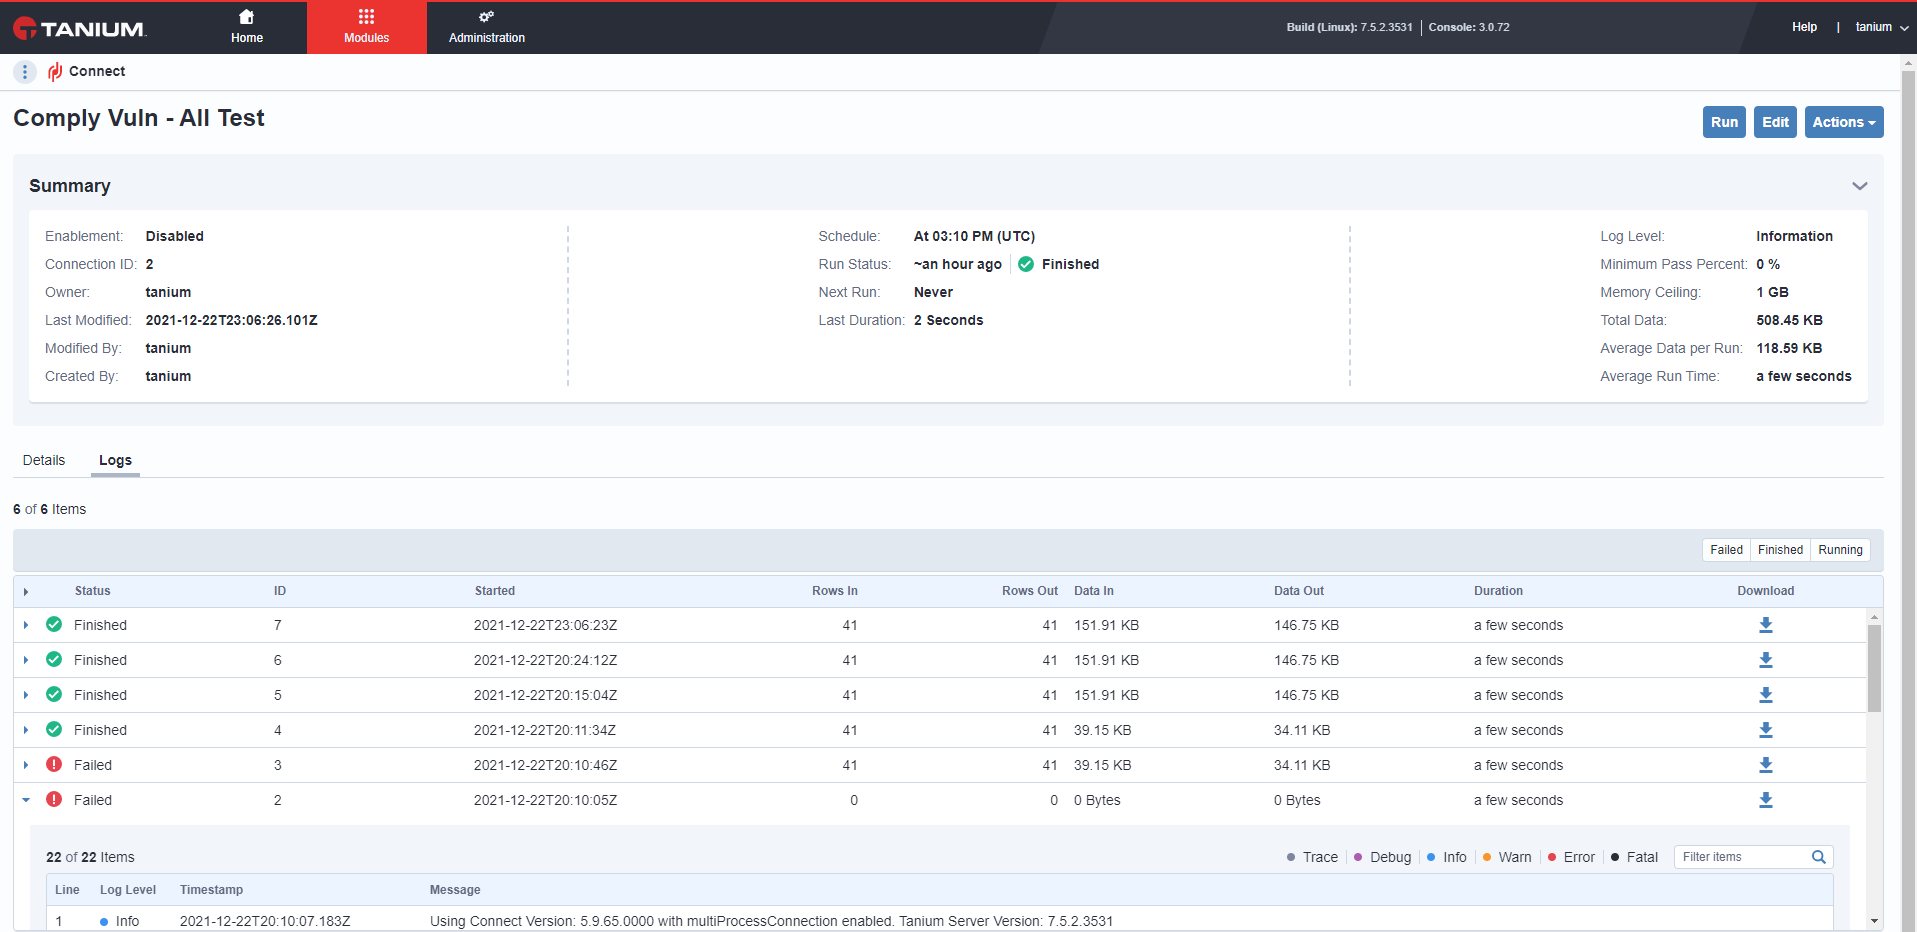
Troubleshooting Tips
- If you see that the job "Failed" in Tanium Connect, check to confirm the report or the Connect job is configured correctly on the Tanium side.
- If the connection is not going through, check your outbound firewall rules for potential issues.
- If the connection is not going through and the firewall rules are set to support the connection, check the proxy settings for Tanium Connect. Sometimes teams have the Connect module proxied, and the proxy is configured to block HTTPS traffic.
- If the resulting job is "Finished", that means that Nucleus successfully received the file, started processing the data, and the Tanium Connect module ran successfully. The Tanium Connect module has run succesfully. However, this does NOT mean that the file is correct, so if you do not see the file in Nucleus within an hour of confirming the "Finished" message on the Connect job, check with your Nucleus support team to make sure that the headers are correct and that the file processed successfully.
If you have any questions, please contact us through the support center.