Overview
When changing the status of a vulnerability finding to a resolved status, you can set the status to automatically revert back to an active status of your choosing after a set period of time.
Setting a status expiration
You can set a resolved status to automatically revert to an active status in a variety of ways.
Manually setting an expiration
- From the navigation bar on the left, under Vulnerabilities, select Active.
- Select any number of findings.
- Under the Status column, click the Edit status for all assets pencil icon.
- Select the resolved status that you’d like to designate for the selected finding(s).
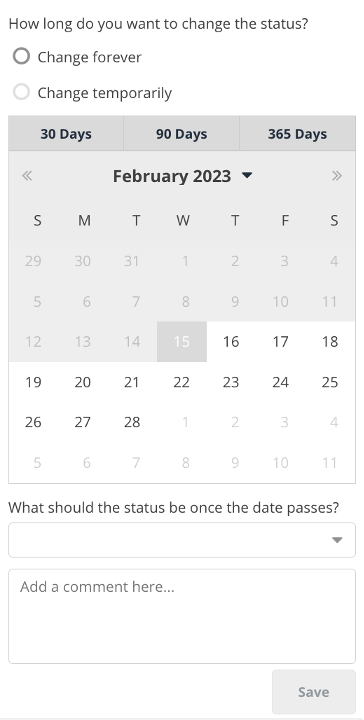
- Select Change temporarily.
- Select a duration:
- 30 days
- 90 days
- 365 days
- Or select a custom date in the calendar.
- From the What should the status be once the date passes? menu, select which active status the finding(s) should revert to after the expiration date passes.
- Optionally, in the Add a comment here... field, enter a comment.
- Click Save.
Seting an expiration via automation
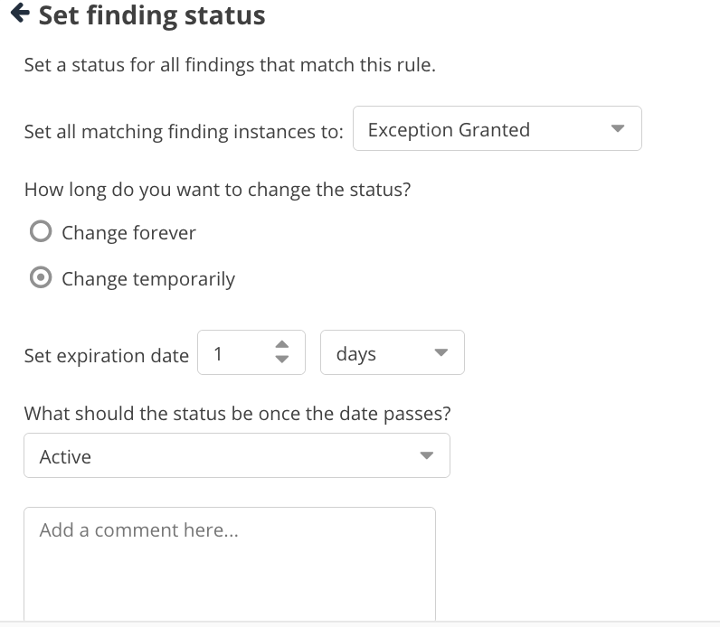
- Create a new Finding Processing rule.
- Setting the Rule action to Set finding status.
- From the Set all matching finding instances to menu, select a [resolved status]](/v1/vulnerability-statuses#resolved-statuses).
- Under Change temporarily, enter how many days, weeks, or months before the status will expire.
- From the What should the status be once the date passes? menu, select which active status the finding(s) should revert to after the expiration date passes.
- Optionally, in the Add a comment here... field, enter a comment.
- Click Save.
Viewing which findings have an expiration set
In the Resolved Vulnerabilities page
- From the navigation bar on the left, under Vulnerabilities, select Resolved.
- In the Status column of the table, a calendar icon indicates resolved vulnerabilities that will revert back to active within the next 30 days. Hovering over the calendar icon shows the number of instances of that vulnerability that are set to expire. Vulnerabilities with zero instances set to expire within 30 days will not show a calendar icon.

Filtering by status expiration on the resolved vulnerabilities page
We have included basic filtering capabilities in the resolved vulnerabilities page so you can see which vulnerabilities have a status expiration.
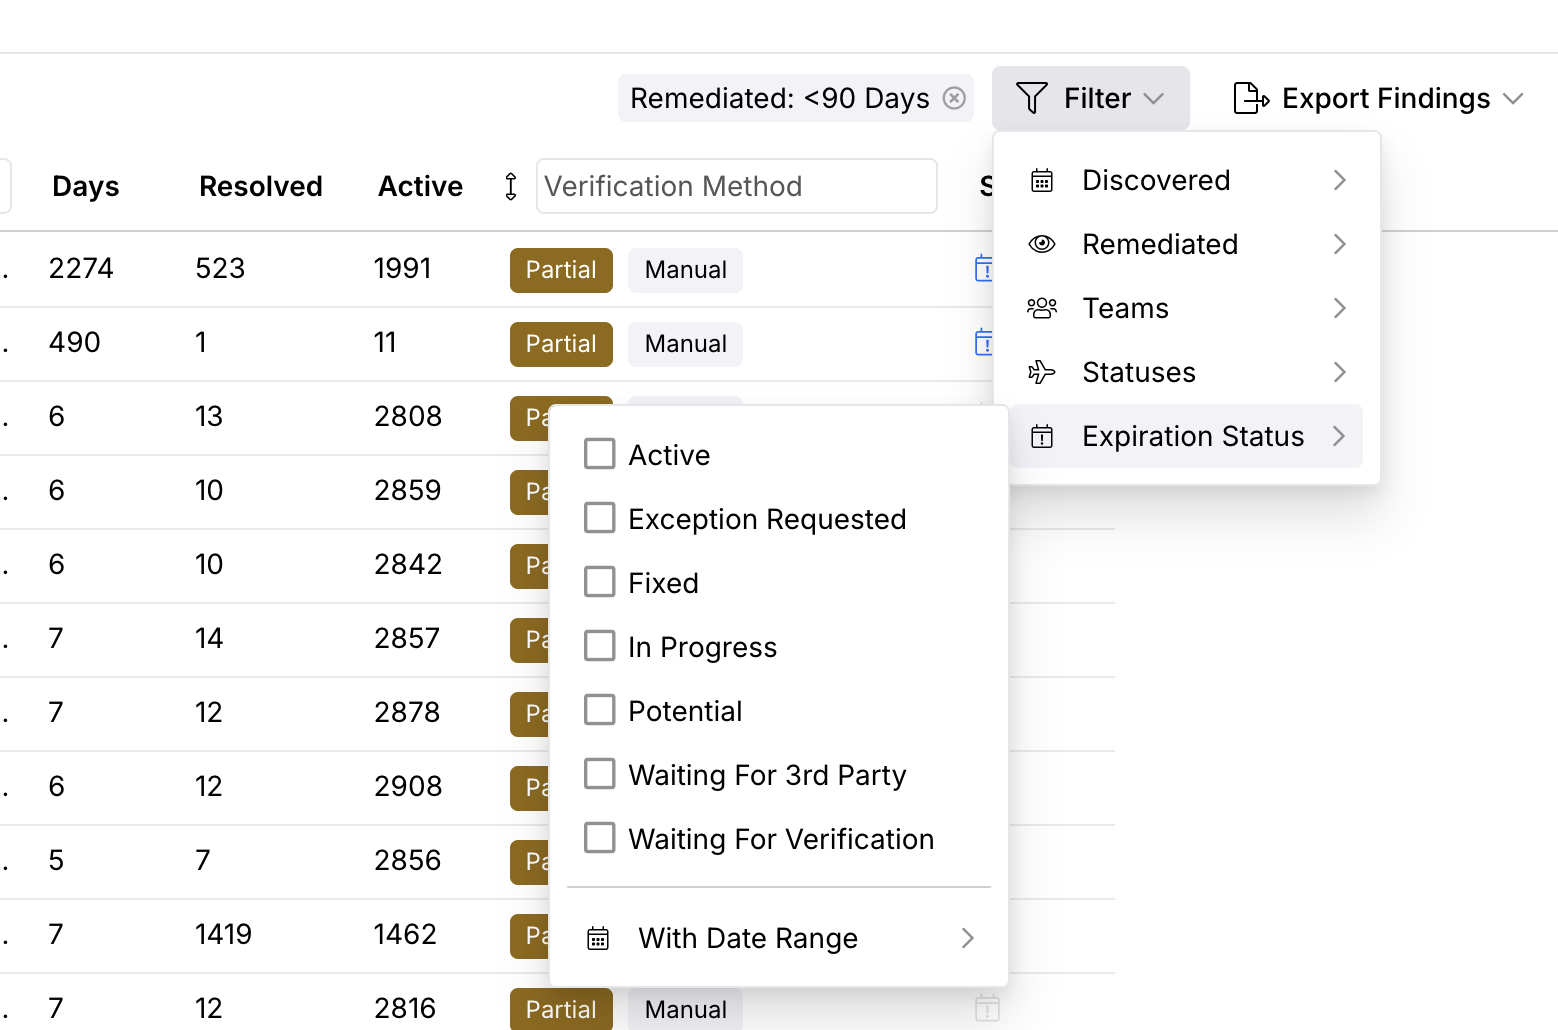
- From the navigation bar on the left, under Vulnerabilities, select Resolved.
- From the Filter menu, navigate to the Expiration Status submenu.
- To view only vulnerabilities that will revert to a specific status, select that status. You can select multiple statuses.
- To view all vulnerabilities that will revert to any status, select all statuses.
- To further filter the list to vulnerabilities that will revert within a specific date range, select the date range from the With Date Range calendar submenu.
In the vulnerability details
- From the navigation bar on the left, under Vulnerabilities, select Resolved.
- Click the name of the vulnerability.
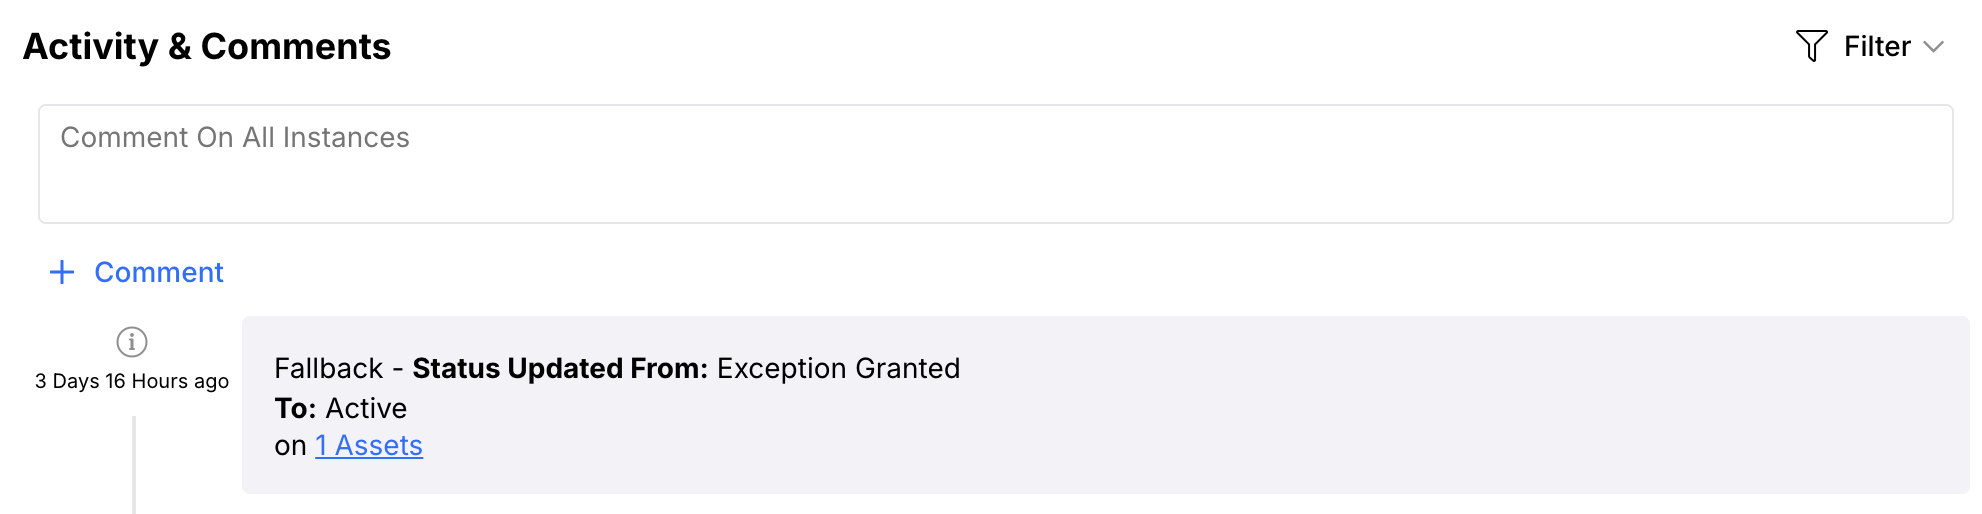
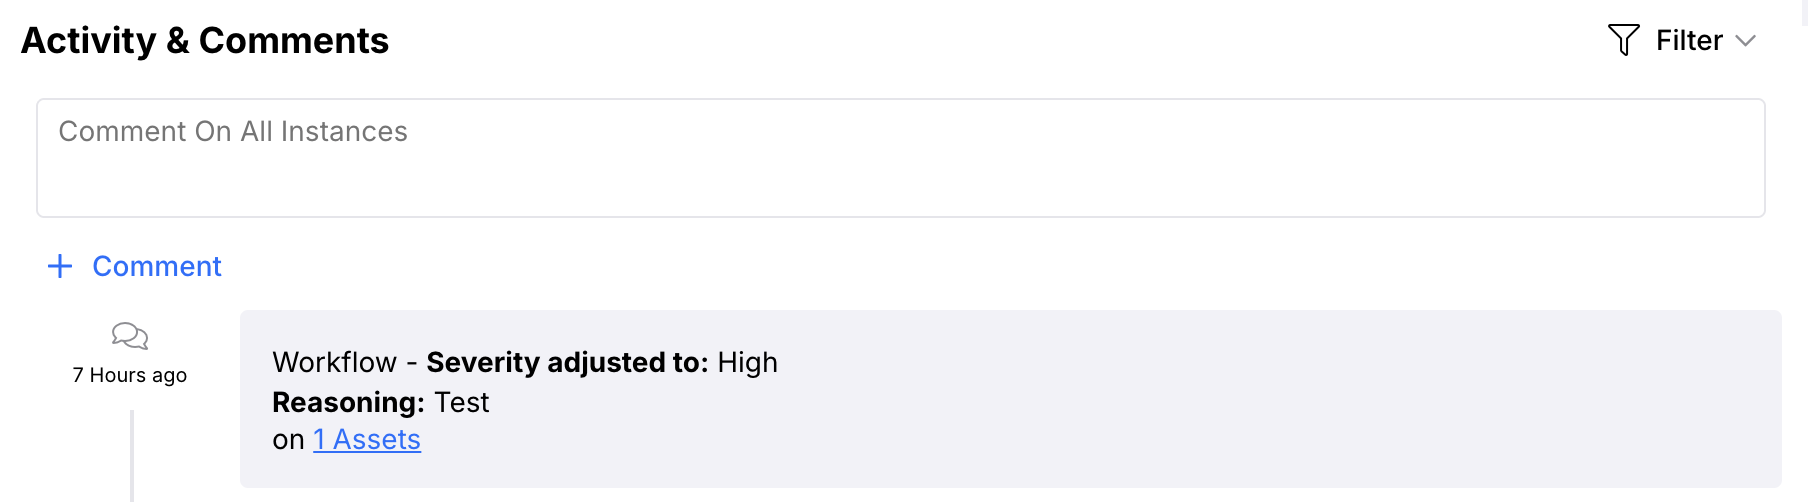
- Under Activity & Comments, the change to a resolved status event will list what date the status Expires on and what active status it Will return to.
Viewing which findings have expired and reverted to active status
- From the navigation bar on the left, under Vulnerabilities, select Active.
- Click the name of the vulnerability.
- Under Activity & Comments, a Fallback status change event indicates the mitigated status expired and reverted to active. Status updated from indicates which mitigated status the vulnerability previously had and To indicates which active status the vulnerability now has.