Create a Service Account in Jira
Nucleus must create, update and close Jira tickets using a Jira user. If you setup the Jira integration using a local user then all new tickets and comments on tickets will be done in that local user's name. Nucleus recommends setting up a service account called Nucleus Bot for this purpose.
Follow these steps for creating a user account as documented on Atlassian's Documentation website.
Create an Application Link in Jira
The following sections provide instructions on how to create an application link in Jira based on your preferred authentication method and version/edition of on-prem Jira you are integrating with.
OAuth 2.0 with Jira Data Center 9.0+
OAuth 2.0 is the recommended authentication method for Jira integrations.
This method provides stronger security controls and improved performance compared to legacy authentication options.
- In Jira, navigate to Administration > Applications > Application Links.
- Click Create Link.
- Select External application, and then choose Incoming as the direction.
- Enter 'Nucleus' as the Name.
- Paste the Redirect URL copied from the add/edit Jira Connector dialog in Nucleus.
- Select 'Write' as the Application Permissions.
- Click Save to finish setting up the application link.
- Copy the Client ID and Client Secret, you will need these to complete setting up your connector in Nucleus
You are now ready to continue creating a Jira connector in Nucleus.
Legacy Authentication Methods
The following authentication methods are supported for backward compatibility but are not recommended for new integrations.
OAuth 1.0a (Legacy) with Jira Data Center 9.0+
OAuth 1.0a is a deprecated authentication protocol and should not be used. This method may result in reduced performance, limited support, and weaker security compared to OAuth 2.0.
OAuth 2.0 authentication is highly recommended for new Jira connectors, and existing connections using OAuth 1.0a should be updated.
To migrate an existing connector:
- Navigate to your Nucleus project, then Integrations > Connector Setup
- Edit your Jira connector
- Select OAuth 2.0 as the authentication method
- Follow the prompt to complete the OAuth 2.0 setup steps
Re-authentication is required when switching authentication methods.
- In Jira, navigate to Administration > Applications > Application Links, then click Create Link.
- Select 'Atlassian Product' as the Application Type.
- Provide your Nucleus url as the Application URL.
- Click Continue. Ignore the error stating “unable to connect to url”, but click Continue again.
- Enter 'Nucleus' as the Name, leave all other fields blank, then click Continue.
- For Consumer Key, enter a 15 character (or more) password of your choice.
- Click Finish to finish creating your application link in Jira.
You are now ready to continue creating a Jira connector in Nucleus.
OAuth 1.0a (Legacy) with Jira Data Center prior to 9.0
OAuth 1.0a is a deprecated authentication protocol and should not be used. This method may result in reduced performance, limited support, and weaker security compared to OAuth 2.0.
OAuth 2.0 authentication is highly recommended for new Jira connectors, and existing connections using OAuth 1.0a should be updated.
To migrate an existing connector:
- Navigate to your Nucleus project, then Integrations > Connector Setup
- Edit your Jira connector
- Select OAuth 2.0 as the authentication method
- Follow the prompt to complete the OAuth 2.0 setup steps
Re-authentication is required when switching authentication methods.
-
From Nucleus, browse to the Project Administration > Connector Setup page then click the Jira icon.
-
Copy the Public Key displayed in the popup.
-
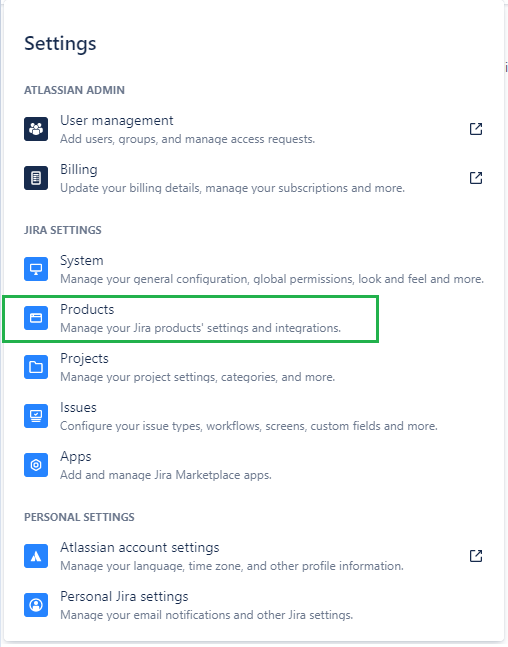
In a new browser window or tab, login to Jira as an administrator and navigate to Jira Settings page.

-
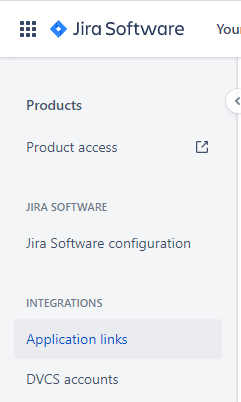
Click on the Products link.
-
Click Application Links
-
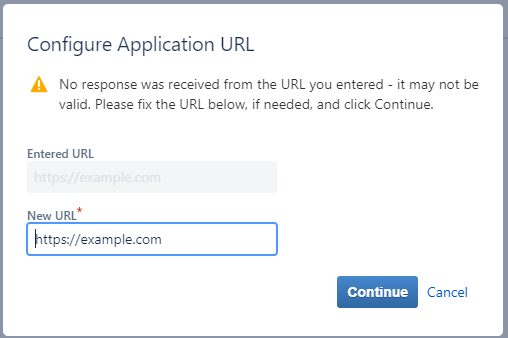
Enter the URL you use to log into Nucleus then click Create new link.
-
In the popup, click Continue.
-
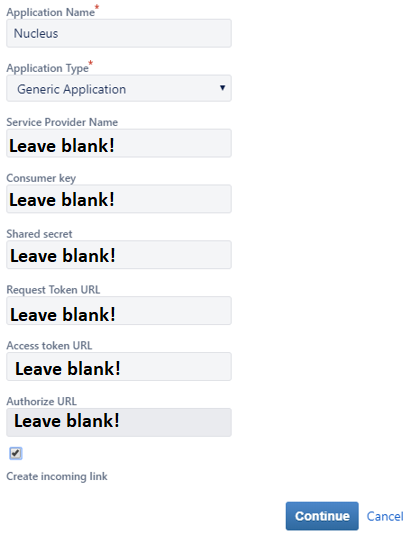
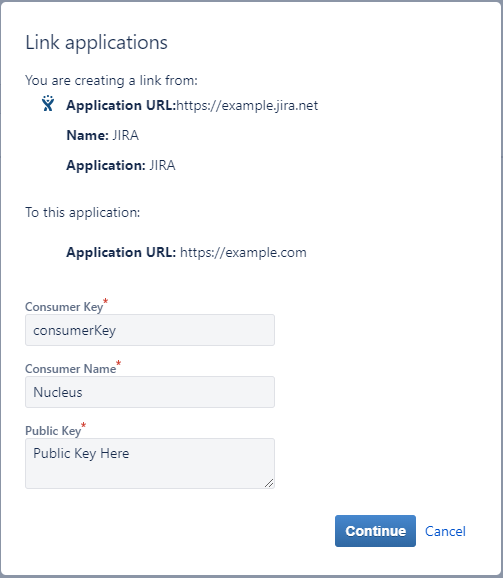
On the Link Applications popup, enter the following:
- For Application Name:, enter 'Nucleus'.
- For Application Type:, select 'Generic Application'.
- Check the Create Incoming Link checkbox at the bottom
- Click Continue
-
On the next screen, complete the following fields then click Continue:
- For Consumer Key, enter a 15 character (or more) password of your choice.
- For Consumer Name, enter 'Nucleus'.
- For Public Key, enter the public key displayed in Nucleus on the Properties tab of the New/Edit Connector dialog.
You are now ready to continue creating a Jira connector in Nucleus.
Basic Authentication
Basic Authentication should only be used when OAuth 2.0 is not supported. This method may provide reduced security compared to OAuth-based authentication.
- In Jira, confirm that Basic Authentication is permitted for REST API access (recommended only over HTTPS).
- Identify or create the Jira user account that Nucleus will use for ticket creation and updates.
- Note the account’s Username (or Email) and Password (or your organization’s equivalent credential) for use during connector setup in Nucleus.
For more information, refer to Atlassian’s documentation on Basic authentication for Jira Server/Data Center.
You are now ready to continue creating a Jira connector in Nucleus.
Personal Access Token (PAT) Authentication (Jira Server and Data Center only)
Personal Access Tokens should only be used when OAuth 2.0 is not supported. This method may provide reduced security compared to OAuth-based authentication.
- Log in to Jira.
- Access your User Profile and click Personal Access Tokens in the left menu.
Note: this may be found under the Security or Access Management section, depending on your version of Jira. - Click the Create token button, provide a label/name to identify the token, then click Create or Generate.
- Copy the token immediately — it will not be shown again.
- Enter the Personal Access Token in the Token field below.
For more information, refer to Atlassian’s documentation on using Personal Access Tokens.
You are now ready to continue creating a Jira connector in Nucleus.
Connecting via the Nucleus Agent
Organizations that use Nucleus also often use tools (scanning consoles, issue trackers, etc.) they'd like to connect that are only accessible from their internal network.
The Nucleus Agent simplifies the tool integration process and gives you the ability to integrate Nucleus with your internal tools without needing to expose each tool on the internet. You'll do this by installing the Nucleus Agent on an internal Linux server (CentOS or Ubuntu) to establish an outbound SSH tunnel to Nucleus servers.
For more information, see Internal Network Configuration using the Nucleus Agent.