Please read Azure AD Setup before attempting to set up role-project mappings to your SSO objects.
This article is intended to help you set up the proper settings in Nucleus to manage your permissions to various projects and roles within Nucleus from your Azure AD console. This works very well when your projects change very little but you'll want to automate/change users with access to those projects often.
Introduction
In Nucleus, SSO mapping accomplishes a very specific task. For example, say you have 10 projects, and each project has a group or a role in Azure AD which needs access to that project and at a specific role level.
The mapping in Nucleus tells Nucleus which groups from Azure AD are equal to the project-role combination in Nucleus.
Before starting the SSO mapping process, you'll need to read the Nucleus support guide on Creating Roles in Nucleus to understand how the roles work in the Nucleus console. You also should have your Azure AD SSO setup and working properly before attempting this mapping.
Once you have your roles set up in Nucleus, the goal is to combine a project-role combination (ie General User - Project1) to a particular group or role within Azure AD (referred to as the SSO object).
So if I have a group in Azure AD named 'Administrators', and I want that group to have access to the project "Administrator Project" at the role level "Project Admin", then I would apply the Group ID from Azure for the group "Administrators" to the "Project Admin - Administrator Project" combination.
Assigning an Azure AD Group to a Role-Project Combination
For this, you will need admin access to the Azure AD console AND to be an Org admin in Nucleus.
You can map the group from AD to a Nucleus Project-Role Combination the following way:
-
Log into your Nucleus console
-
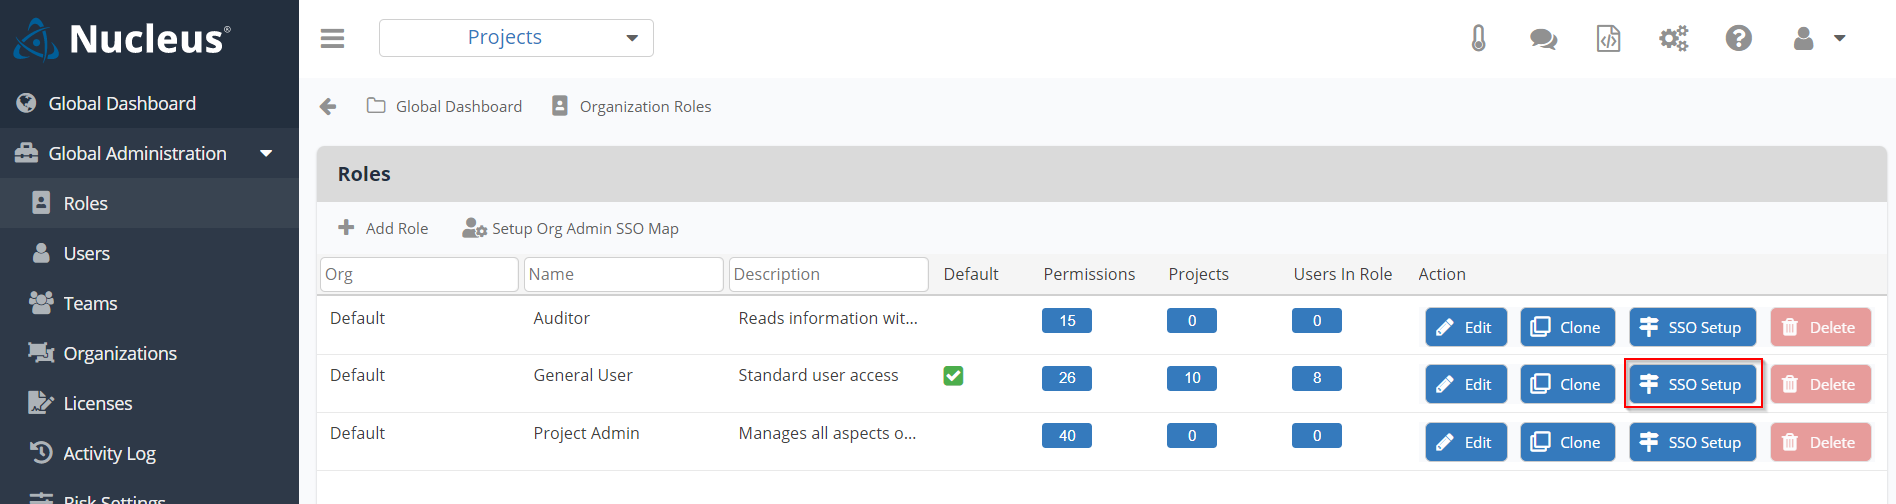
Navigate to Global Dashboard > Global Administration > Roles

Here you will see a list of all the roles which you have defined in your organization in Nucleus.
-
In a second browser window, open your Azure AD admin console
-
Navigate in Azure AD to** Enterprise Applications > Nucleus (SSO application you created to log into Nucleus) > Users and Groups**.
Here you will see a list of all the groups which you have given access to log into Nucleus.
-
Select (click on) the group that you want to map to a project and role in Nucleus.
-
Copy the Object ID on the next screen.
-
Back in Nucleus, find the role level you wish to assign to that group, and select the button SSO Setup
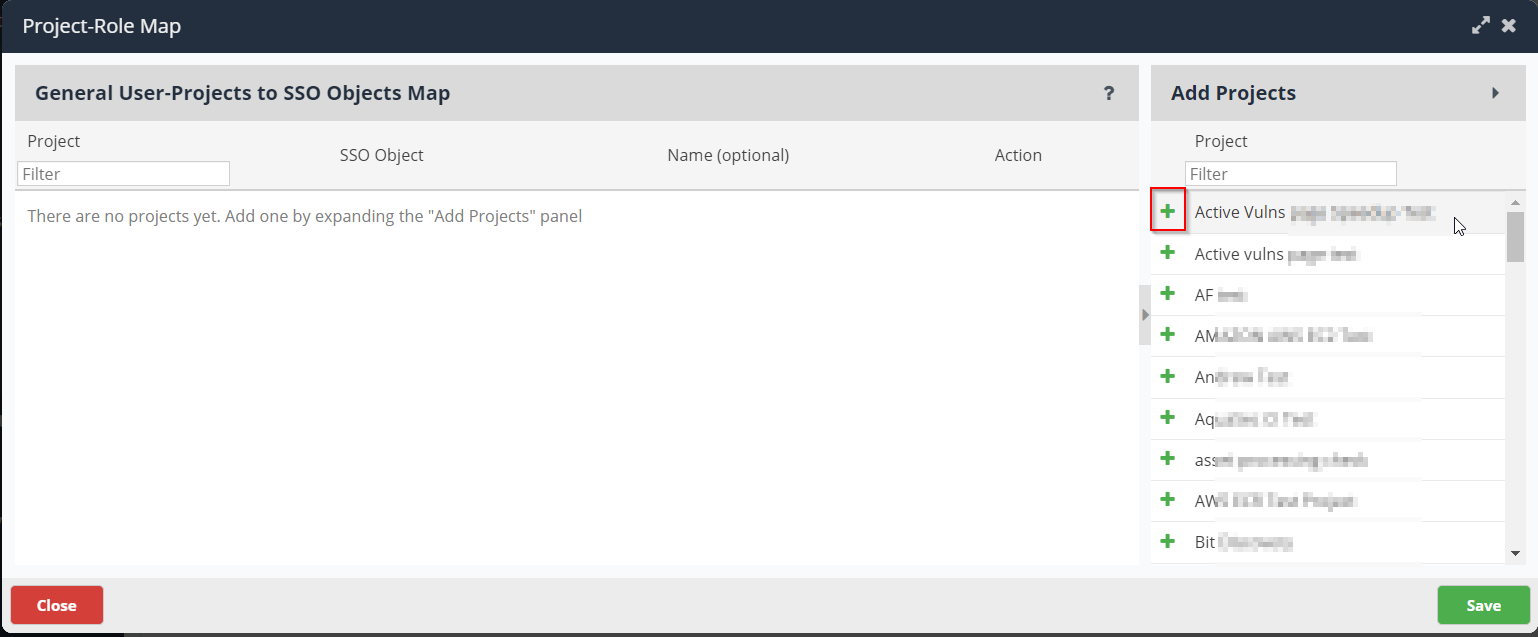
This is the screen where you pick which projects the group will have access to at this role level
- On the right-hand side of the window, if it is not already expanded, click on the Add Projects Panel to expand it.
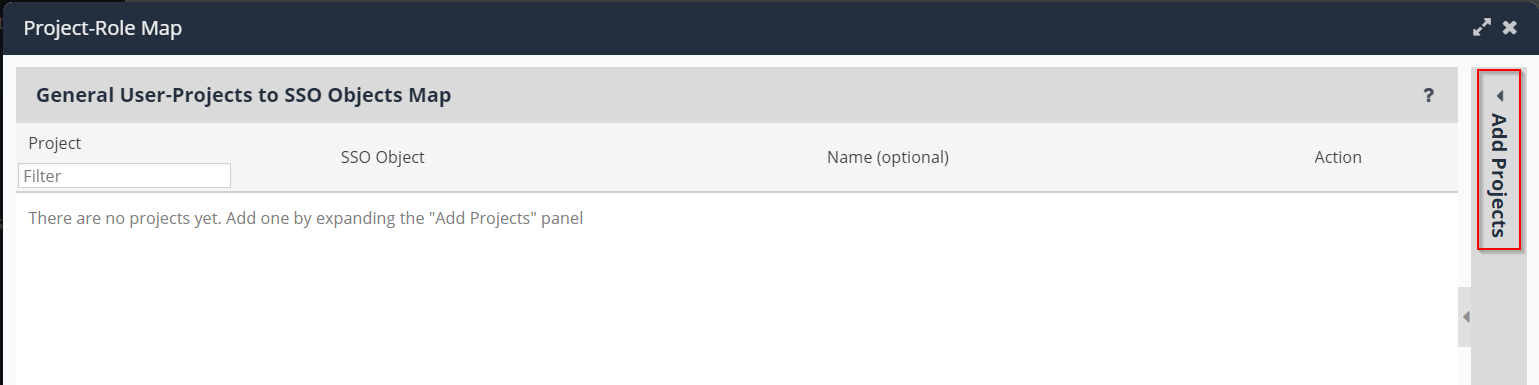
This panel lists all of the available projects in your organization.
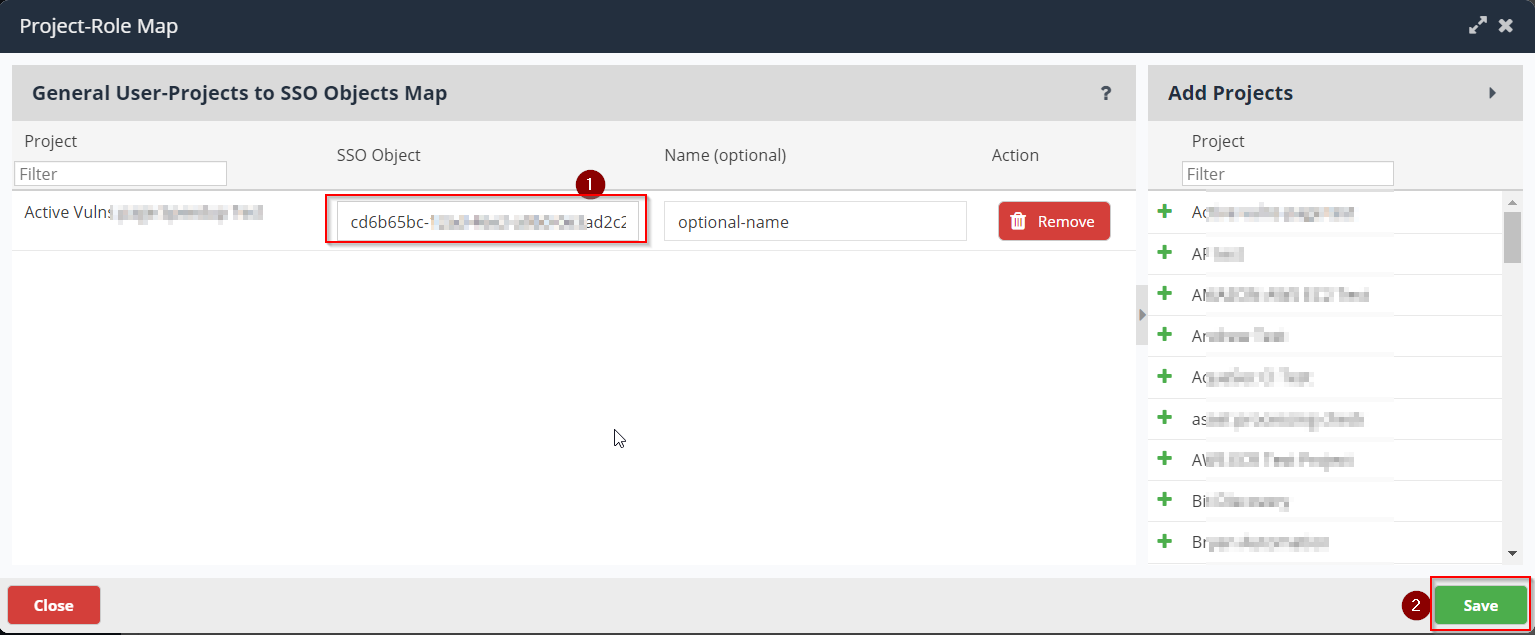
- Use the green + button next to the relevant project name in order to add them to the Role

This process is telling Nucleus which projects you would like this role to have access to. This is the project-role combination. The next step will tell Nucleus which groups should have access to that specific role-project combination.
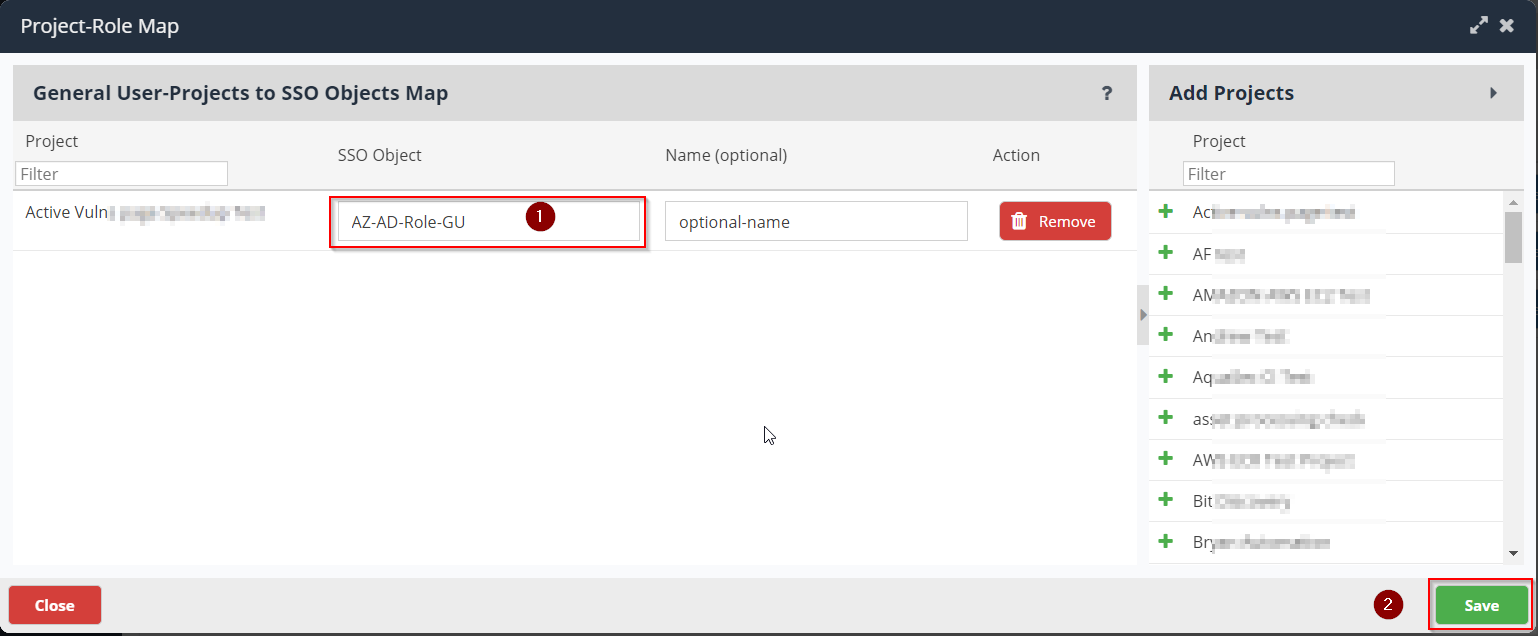
- For each project, you add to the role, paste the SSO Object ID of the group which you copied in Step 6 from Azure AD.
You have now set up your first SSO to Role-Project mapping! The group which you selected should now have access to all the projects at the role level which you selected, just by logging in through SSO! Now if you change users in the group in Azure, those permissions will carry forward into Nucleus.
For example, 5 users are part of the "Administrators" group in Azure AD. After the mapping, those 5 users will get access to the project-role via SSO. If you remove one of the users from your Azure group, then that user will be unable to log into Nucleus (unless you give them permissions through a different group). This allows you to manage all user permissions through Azure, and once the SSO-mappings are set up, user management can be handled exclusively through your Azure AD console.
Assigning an Azure AD Role to a Role-Project Combination
For this, you will need admin access to the Azure AD console AND to be an Org admin in Nucleus.
You can map the group from AD to a Nucleus Project-Role Combination the following way:
-
Log into your Nucleus console
-
Navigate to Global Administration > Roles
Here you will see a list of all the roles which you have defined in your organization in Nucleus.
-
In a second browser window, open your Azure AD admin console
-
Navigate in Azure AD to Enterprise Applications > Nucleus (SSO application you created to log into Nucleus) > Users and Groups.
Here you will see a list of all the groups which you have given access to log into Nucleus, and what role they have in the application.
-
IDentify the role that you want to map to a project and role in Nucleus.
-
Copy the Role Name.
-
Back in Nucleus, find the role level you wish to assign to that group, and select the button SSO Setup.

This is the screen where you pick which projects the group will have access to at this role level
- On the right-hand side of the window, if it is not already expanded, click on the Add Projects Panel to expand it.

This panel lists all of the available projects in your organization.
- Use the green + button next to the relevant project name in order to add them to the Role
This process is telling Nucleus which projects you would like this role to have access to. This is the project-role combination. The next step will tell Nucleus which groups should have access to that specific role-project combination.
- For each project, you add to the role, paste the SSO ** Role Name** of the role which you copied in Step 6 from Azure AD. All users with this role will be given access to the role-project combination within Nucleus
You have now set up your first SSO to Role-Project mapping! The role which you selected should now have access to all the projects at the role level which you selected, just by logging in through SSO! Now if you change a user's role in Azure, those permissions will carry forward into Nucleus, and their permissions will change as such.
For example, Jim is an Administrator role in Azure AD. That role is mapped to the Nucleus combination "Project1-Project Admin". Jim must log into Nucleus using SSO and he will have access to the Nucleus combination. If Jim's role in Azure AD changes, then he will no longer have access to that specific project-role mapping.
Once your SSO is fully set up, start importing scans, analyzing your vulnerability data, and automating your vulnerability management workflows!