Overview
Nucleus enables you to sync your Rapid7 InsightVM data directly from the Rapid7 Nexpose console into the Nucleus console using an automated connector.
At this point in time, the Rapid7 connector supports ingesting vulnerabilities on hosts from the Nexpose console.
Connector Setup
Connector Setup Checklist
Follow the steps in this checklist to successfully set up this connector:
-
API Access
Create a service account in Rapid7 InsightVM. -
Connector Configuration
Create and configure the connector in your Nucleus project. -
Vulnerability Scan Data Ingestion
Create vulnerability scan ingest rules to ingest vulnerabilities from InisghtVM Nexpose.
1. API Access
Follow the steps in Rapid7's InsightVM documentation to add a new user.
Please ensure your account has the correct permissions to retrieve Rapid7 data. For example, using a Rapid7 Global Administrator account will give you permission to select all Sites, Groups and Tags. You can find more information about permissions here.
2. Connector Configuration
-
In Nucleus, go to Integration Hub > Connectors Setup.
-
Under the Scanners section, click the Rapid7/InsightVM icon.
-
In the Setup Rapid7 Connector popup, complete the following fields:
| Field | Description |
|---|---|
| Name | Enter a short unique name for the connector, such as "Rapid7 ServerName" |
| Description | Optionally, enter a description for the connector. |
| URL | Enter the url for your Rapid7 login page. |
| Username | Enter the username of the user you use to log into Rapid7. |
| Password | Enter the user password for the username you just entered. |
-
Click the Save Connection button and wait for the Success message.
-
Click the Test Connection button. You'll see a message notifying you that the connection test was successful. Your connector is now setup properly.
3. Vulnerability Scan Data Ingestion
-
Go to Integration Hub > Import via Connector.
-
Select the InsightVM connector you just created.
-
Choose to import a Site Scan, Site, Asset Group, or Asset Tag at one time.
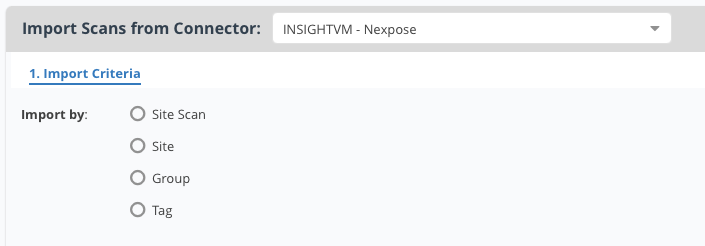
-
Click Next and select either the Site Scans, Sites, Asset Groups or Asset Tags you want to import.
-
Select a how often you want to import, either one-time or auto-imported on a schedule.
-
Click Save & Finish.
Frequently Asked Questions
How can I most efficiently ingest data at scale?
For the best outcomes with ingesting large amounts of data quickly from InsightVM into Nucleus we strongly recommend that you tag all assets with a single Nucleus tag (including across multiple sites) and create a single daily scheduled ingest job to ingest this tag. The InsightVM Nexpose console does not scale well when requesting many scan files and without following this approach there is a higher likelihood of causing impacts to the availability of Nexpose, and generating job backlogs in Nucleus.
How do I prevent InsightVM from identifying ghost assets?
Occasionally the InsightVM Nexpose console may identify ghost assets (assets with no hostname, operating system or findings), which can be ingested into Nucleus, resulting in skewed asset data and trends.
This can be caused due to a misconfiguration in the scan template being used where TCP reset responses are treated as live assets. Please review this section and ensure that this is disabled. You can read more about this and other scan template best practices here.
Why are my ingestions failing with the message "Scan date is in the future"?
The Nucleus ingestion ETL pipeline includes checks for data integrity at multiple stages including during ingestion, where there is a check to ensure that all scan dates for all assets are before the time of processing (UTC). This ensures that incorrect or malformed data is not erroneously ingested into your Nucleus project.
If the scan ingestion job fails with the message Error - Scan date is in the future, this indicates that at least one asset in the normalized file has a scan date that is in the future relative to the time that ingestion is occuring. For Rapid7 InsightVM, this can occur if the Nexpose scanner engine and/or console has an incorrect timezone configured.
To resolve this issue, ensure that the systems configured with the console and scanner engine's installed have the correct timezone configured and re-run scans for the affected assets. To set the system timezone correctly, follow the steps in Rapid7's documentation here.
If you have any questions, please reach out to our support center or email [email protected].